
Comprehensive Computer Virus Removal Procedures
If You Know Your Computer Is Infected
Do NOT Panic. If you see symptoms as described in Virus Infections or you simply suspect something is really wrong, you will want to have a clear head to work on resolving the problem. To be safe any important documents whether they be pictures, videos, text files, or software installers should be backed up on removable media and set aside to be scanned later and ensure they are safe to use. Knowing that there are several tools you can use to eliminate a computer virus and/or other malware infections should give you some hope and here can be found some things to help remove viruses and other malware from your computer. Below are outlined some key steps to take and how to get tools you might not currently have, some being very important and useful. Bear in mind that often times a bad virus can prevent any currently installed antivirus programs from functioning properly and that means you may have to operate without the help of that program. You may need to use a clean, uninfected computer to get some of the tools you'll need as well. Now let's get started with a short list of must-haves to clean a virus from your computer.
What You Need To Remove A Computer Virus

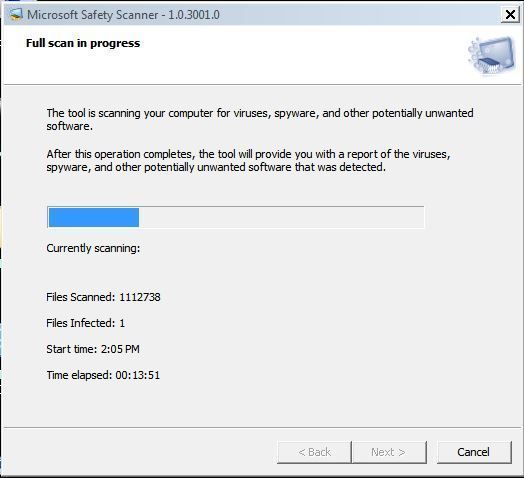
Get bootable rescue tools, meaning a disk that will boot the computer (and hopefully update itself). You may already have one provided by your installed antivirus program, but if you don't have one you can make one easily. This would require an uninfected computer to accomplish but it will be worth the effort. Windows Defender Offline (WDO) can find many infections and is updated as you create it (that linked article describes exactly how to create and use it). Some Antivirus vendors do offer access to online scanning and/or bootable rescue tools and both, especially the latter, would be worth using (Kaspersky Rescue Disk 10 is excellent). Get the Microsoft Safety Scanner and if you're using a different machine than the infected computer be sure to choose the correct (32 or 64-bit) version and save it where you can then move it to the infected machine for use later in the procedure.
If you don't have any third party Antivirus software already installed there is likely a Microsoft Antivirus product installed. For Windows Vista and Windows 7 users Microsoft Security Essentials may well be installed and with XP, Windows 8/.1 and Windows 10 Windows Defender should be there (yes, Microsoft still updates Windows Defender for XP). If one of those is all that is installed, be prepared to boot the infected computer to Safe Mode With Networking once bootable disks have run scans (generally by hitting F8 repeatedly to see that option) and if need be you can download and run another Antivirus program (such as MalwareBytes) because this entire effort works best when multiple tools are brought to bear.
Computer Virus Removal Procedure
*** If you have a safe backup, as in one which was not connected to the system when the virus symptoms first appeared, your best option would likely be to restore that backup. If it was connected it may still be worth a shot. Take that shot. That action would overwrite the infected system with the (hopefully) uninfected image of the backup. If that works, you have the easiest solution and might thereby not need to engage the following procedures.***
If the backup is not available take these important preliminary steps. Step 1:Save ALL FILES you know are important, and those you think might be important to removeable media (to scan later before using). Step 2: Gather any disks used to previously install software currently on the infected machine including the OS (in worst case scenarios it may have to be restored). Step 3: Have pen and paper ready to take notes of what is detected and whether it was deleted, quarantined, or not successfully removed. Step 4: Decide if you want to start by turning off the system restore function or move right into booting with a rescue tool. Please read the next section before you decide.
Turn Off System Restore or System Protection
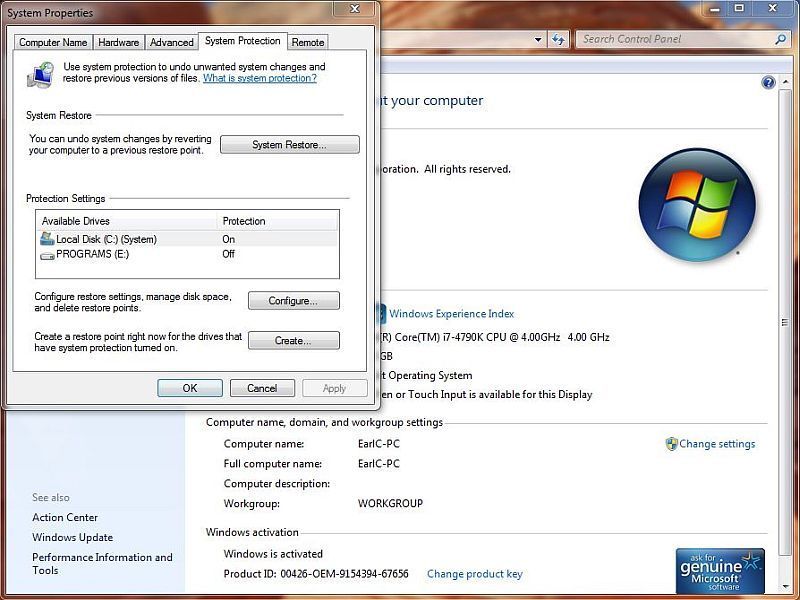
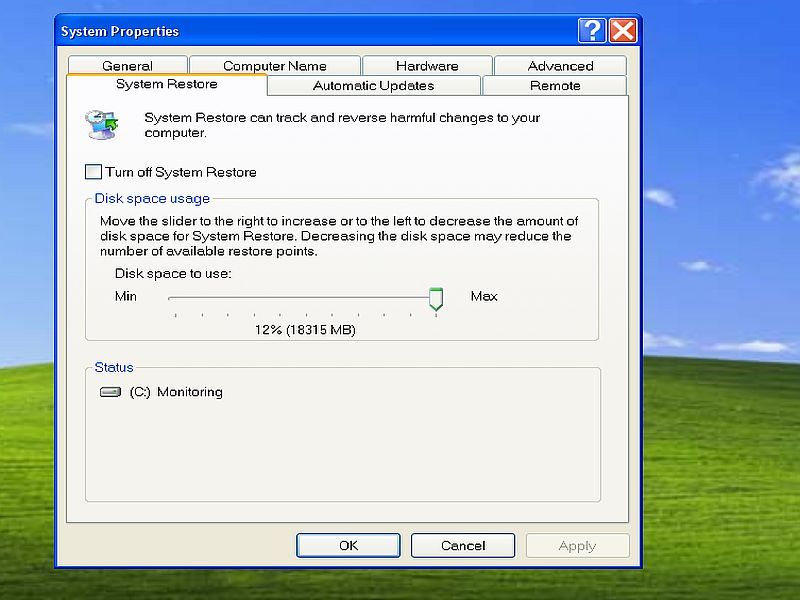
To do this is very easy. Just right-click on your My Computer icon on the desktop and choose Properties or go to your control panel and choose System and Security > System > Advanced system settings (which is on the left ). Choose the System Protection tab and then hit the Configure button. There you can simply turn it off by hitting the radio button next to Turn System Protection Off. This works the same way in Windows Vista, 8/.1 and Windows 10, and is only slightly different in XP (click the second image) This DOES wipe out any Restore Points.
Although it may be possible to remove computer viruses without doing this, if you try and find your computer to still be infected, you will need to do this. Computer viruses often times will attempt to hide within system restore and or system protection files. This is because they are far more difficult to identify and quarantine or remove when they are resident within this environment. It is for that reason that system restore or system protection needs to be turned off to be certain that the antivirus software being used has the best chance to succeed. That said, one needs to be sure that all important installers on the infected drive are backed up knowing that turning off system restore or system protection eradicates previously saved restore points. Although it's true this can be a hassle it is very important to do this therefore one must bear in mind that the only restore point available in the near future will be created after the computer virus removal is complete, system restore or protection has been turned back on, and a new restore point can be made.
Starting The Computer Virus Removal
When you have gathered your tools start by scanning with a bootable rescue tool and note what it found, especially anything it states it could not remove. If you have two different such tools, run both. Since I use Symantec's Norton 360 I run NBRT (Norton Bootable Rescue Tool) followed by WDO to begin. You will need to boot your machine to a CD/DVD or USB flash drive so you may need to set the boot order in the BIOS (accessing the BIOS usually happens by hitting DELETE or F2 on start-up but this does vary). You may also have the option of using the boot menu (which may be F11 or F12 but also varies and is better as it should revert on subsequent boots). Since the boot order for most computers is typically set with CD/DVD first you may not need to change it if that is the media your tool is on. Otherwise, set the BIOS or boot menu to boot to what you are using first in the boot order and start the scan choosing FULL SCAN if you have the option. Don't forget NOTES! Once complete -- both times if you have them -- boot the machine again but this time FIRST remove any disks and/or USB devices, set the boot order back where it was if using BIOS and get into Safe Mode With Networking (F8).
Once you are booted into Safe Mode With Networking there are a few things to check. If your scan(s) found and resolved any infections that's great! But let's try to be certain - see if any currently installed Antivirus software will work and if it does update and run a full scan. If however you do not have Antivirus software installed please do so at this time. If you have an installer ready to copy to the infected machine, see if it will work. If not try to download one but should your web browser be redirecting you per some remaining infection, please read instruction on how to kill the process of the infection if it is identifiable (NOTES!) and reset your browser here.
I know this seems like a lot of work and it is, however it would also be advisable to run the Microsoft Safety Scanner while still in Safe Mode and all scanning should be set to FULL SCAN. Many times these infections can be resolved with only a few of the aforementioned procedures but as the title of this article indicates this intends to be comprehensive!
Completing Your Computer Virus Removal
Should you find no further evidence of infection once completing parts or all of the above, start your computer normally. It is the intention and the hope of Resolve that by this point your computer virus infection has been resolved. Naturally it makes sense that if any notes taken indicate otherwise, further action may be necessary. Run a full scan with your antivirus software and your computer booted normally, checking the results once again taking notes if applicable. Some infections have very specific removal requirements and if you did see any remaining indications searching for that with the specific name might yield useful results. Most antivirus software vendors do have extensive information available and the one which identified the problem might be a good place to look. If all else fails the unfortunate reality is that without a clean backup the Operating System may need to be reinstalled while wiping the infected drive in the process. This is why it was initially indicated to save everything you can because the result is a "clean install" where all data that was on the drive is erased and must be restored manually along with all Windows Updates. If any issues do remain or if you have any questions please don't hesitate to register and post in the forums and/or you can Contact Resolve.
Tags: Computer Virus