
Article Index
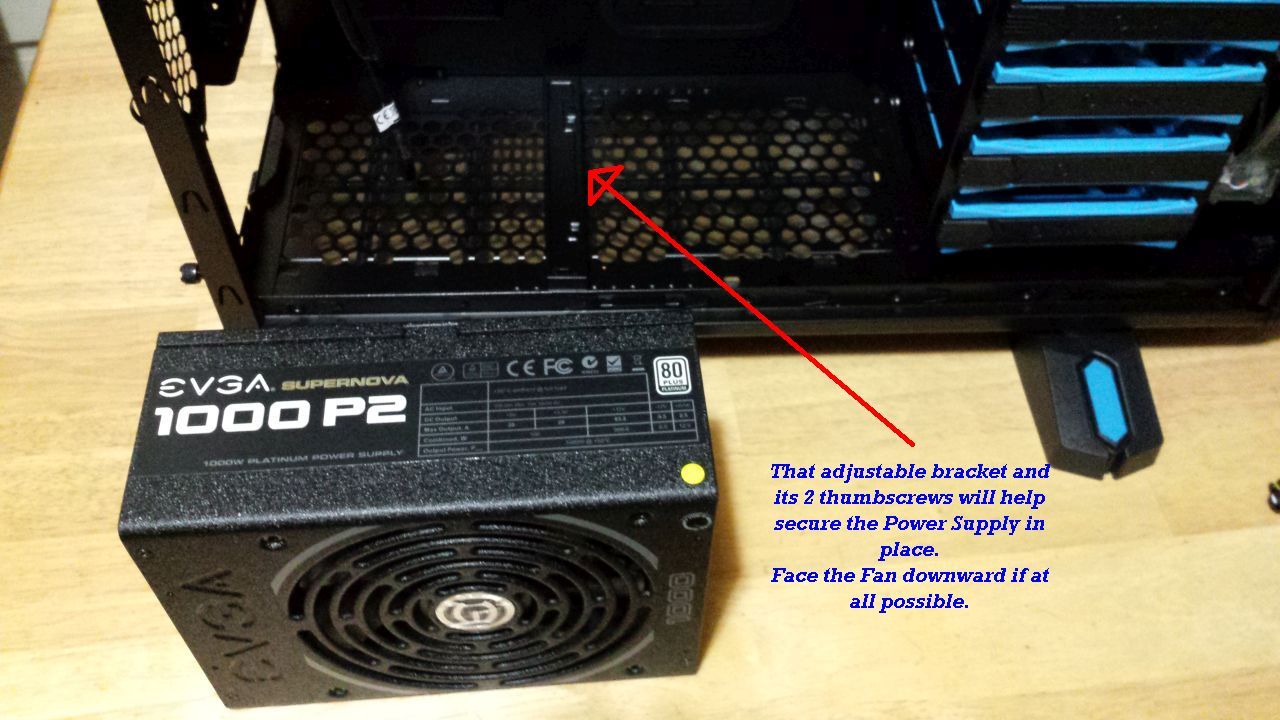
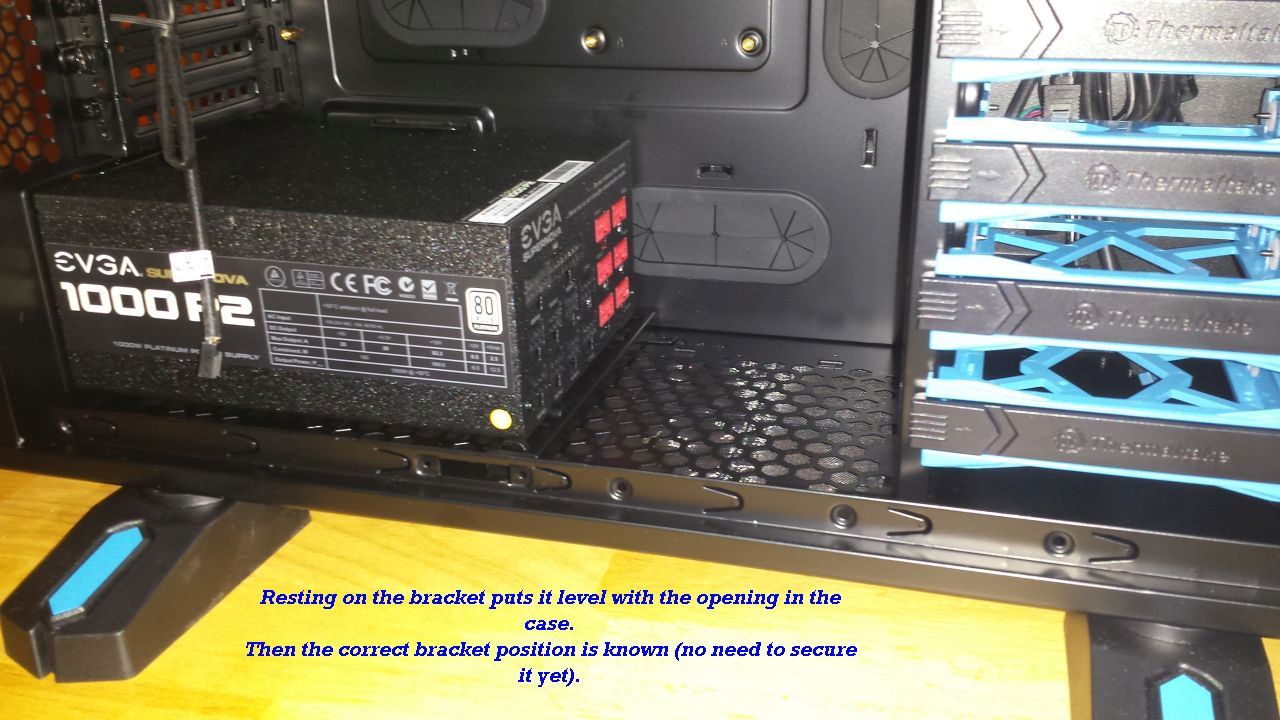
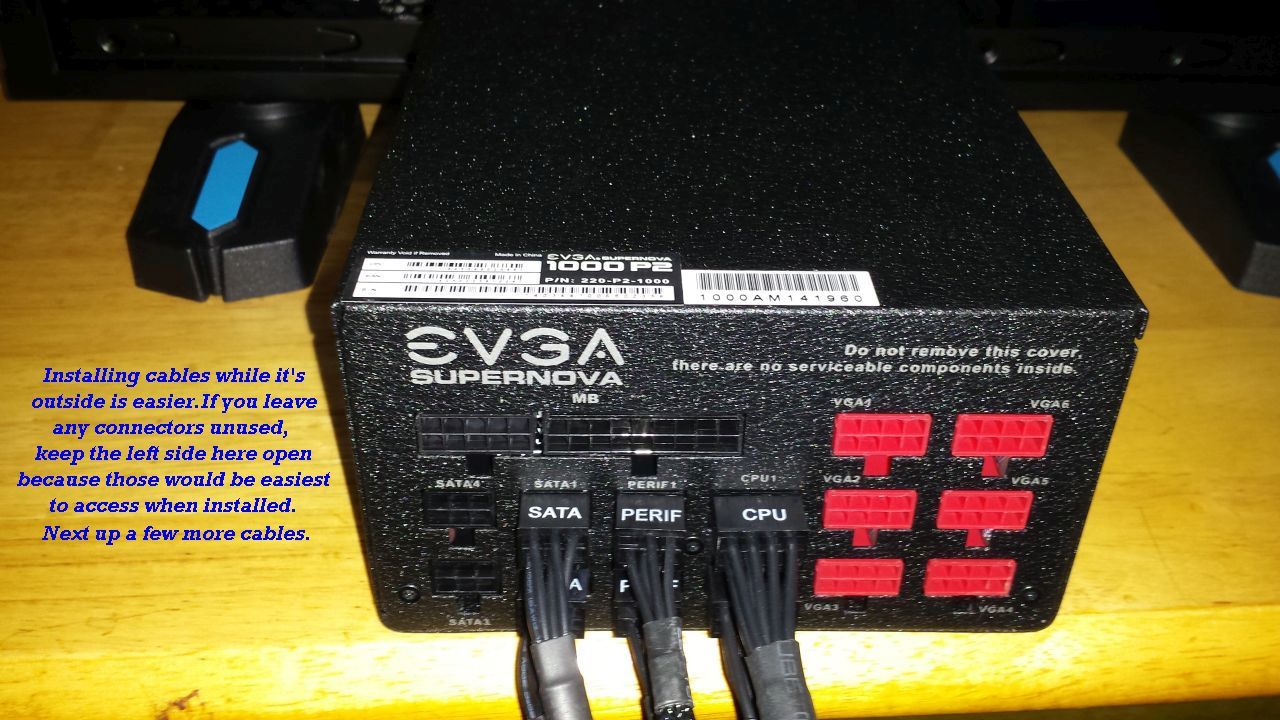
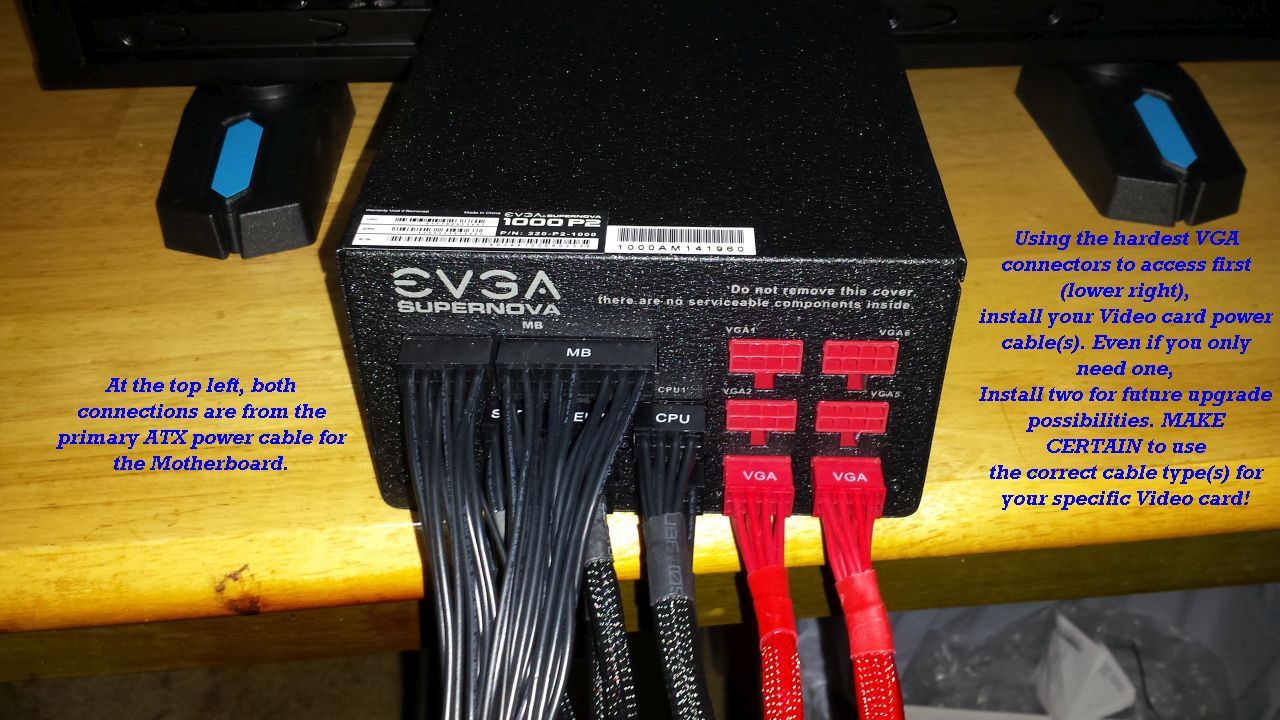
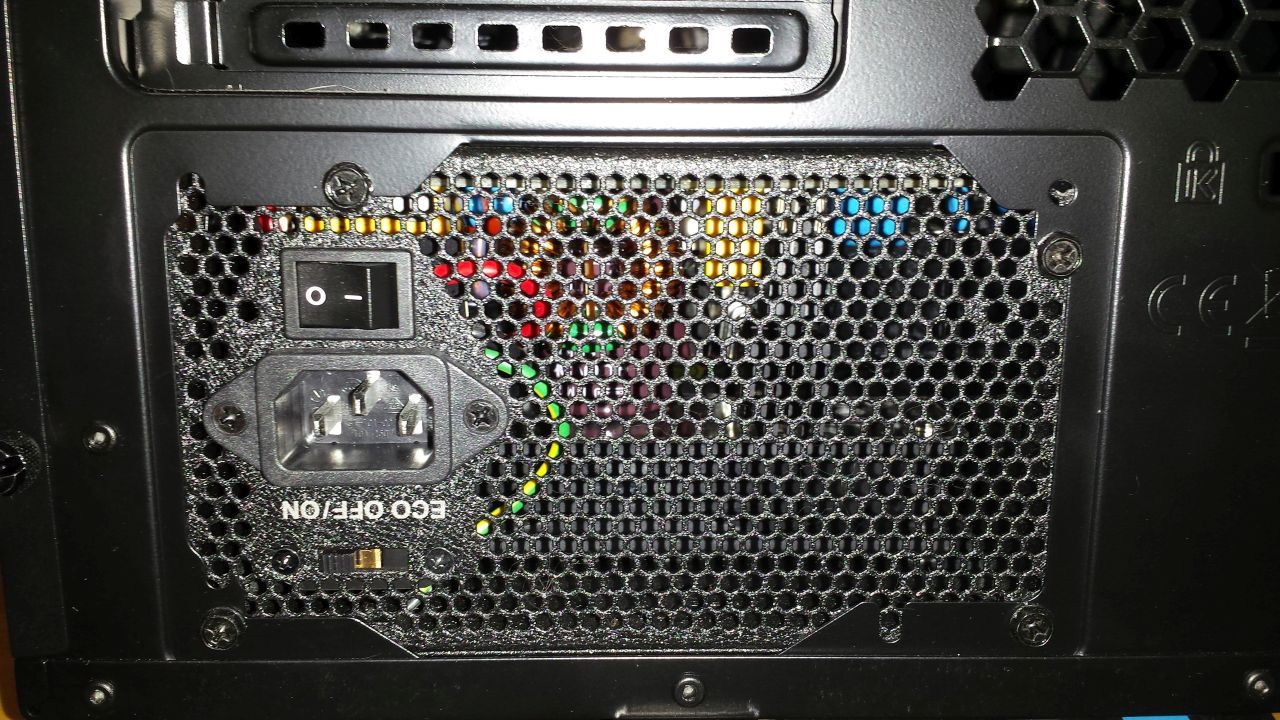
Installing the Power Supply
The power supply is obviously a critical component and it needs to support the power requirements of all components that are involved. Do the math - each component will have power requirements listed in their respective specifications. Add it up -- total maximum wattage of all components needs to be < 80% of the chosen power supply capacity (70% is preferable but just my opinion). Don't forget you might just want to upgrade a video card or even a processor in the future :-)

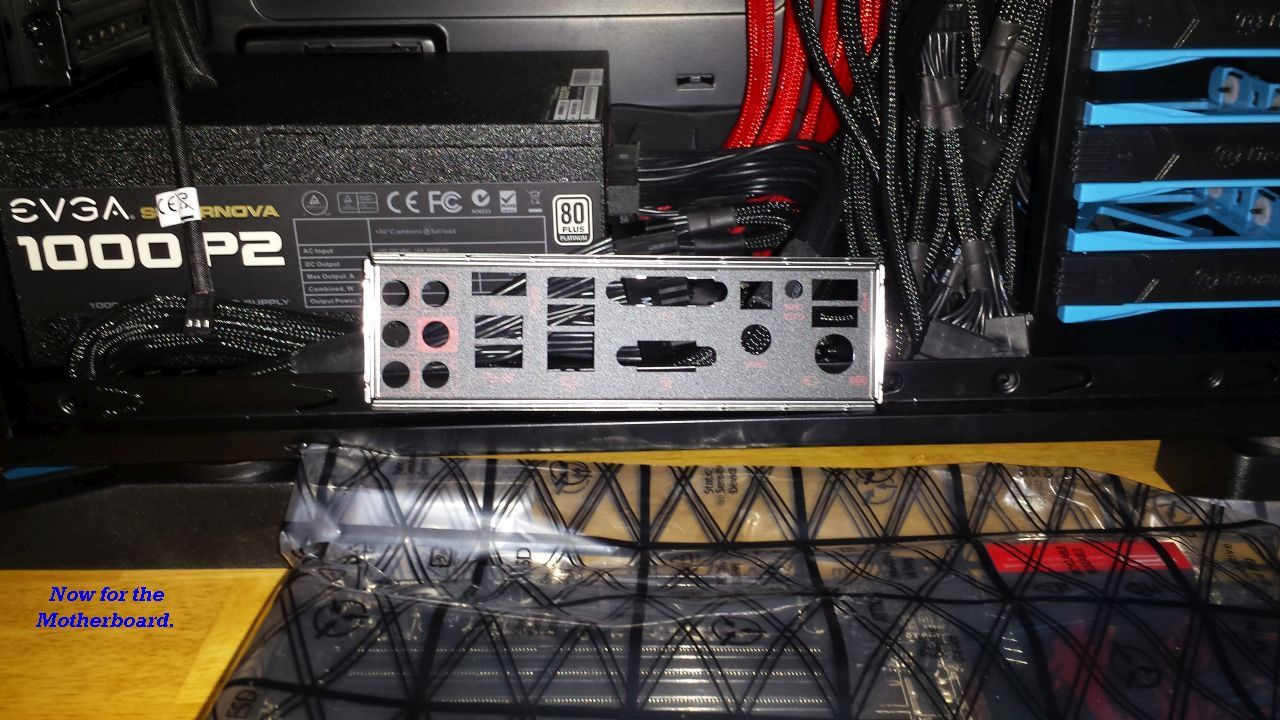
Preparing the Motherboard
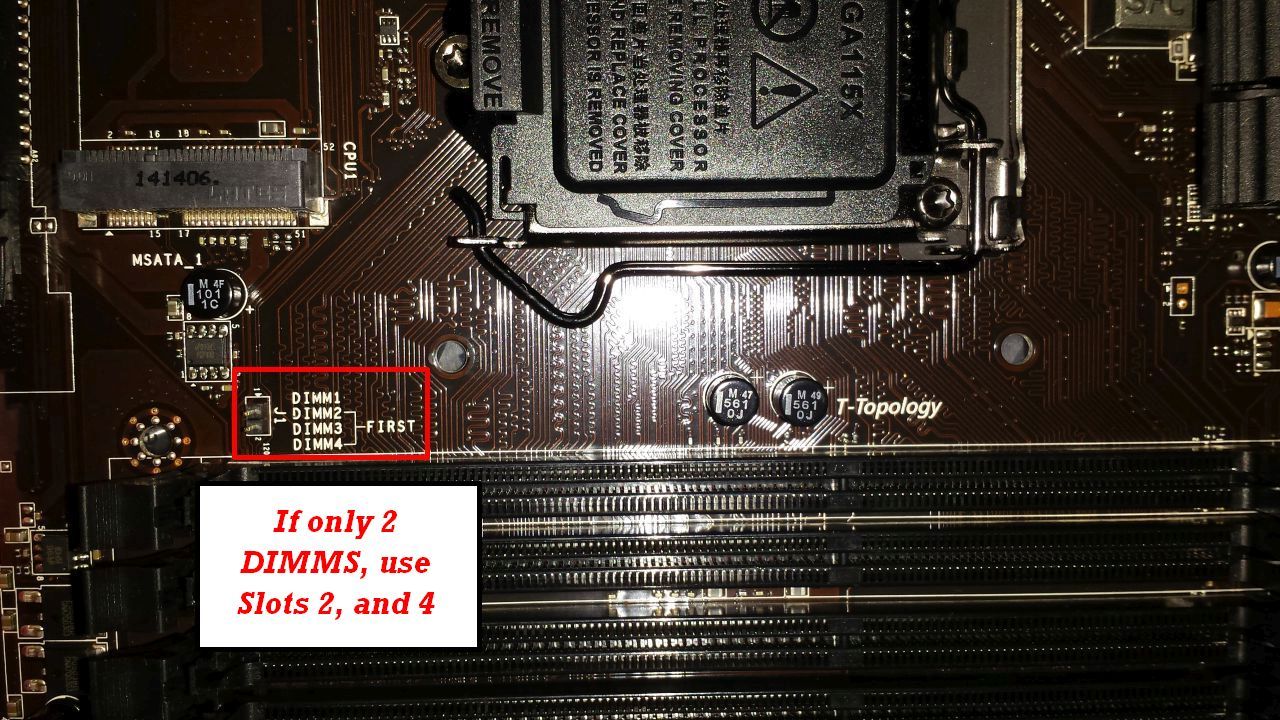
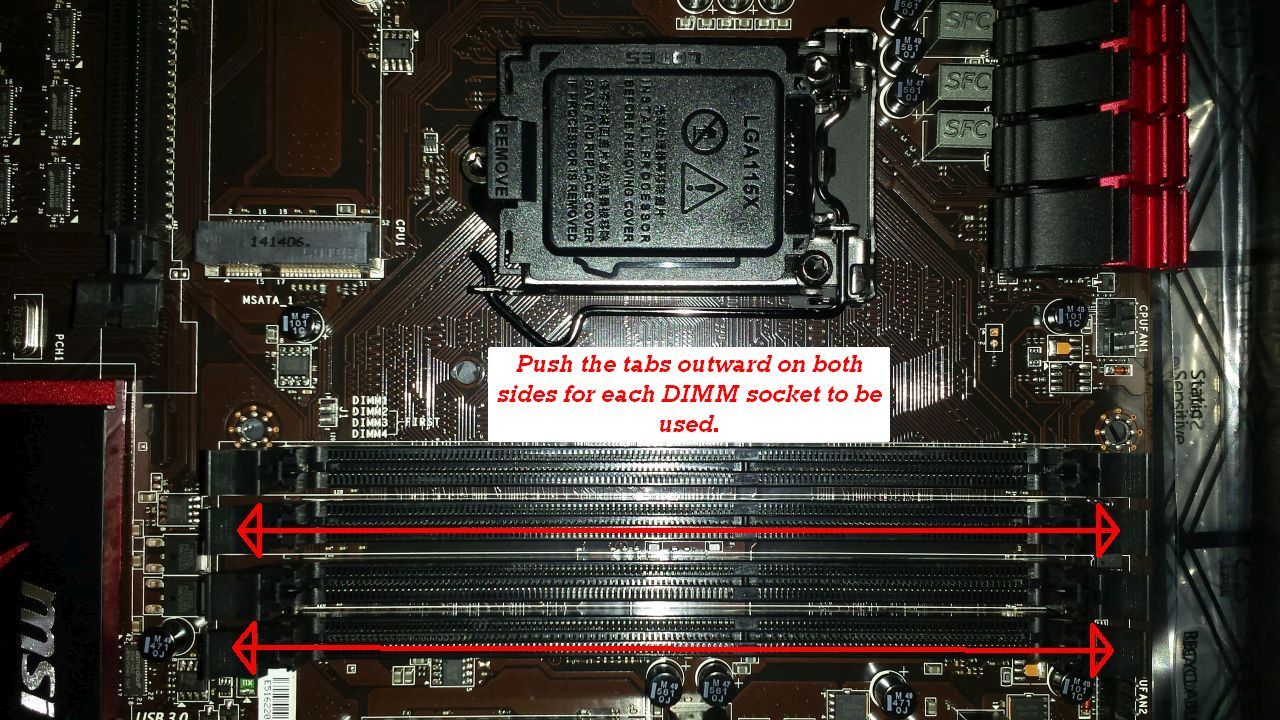
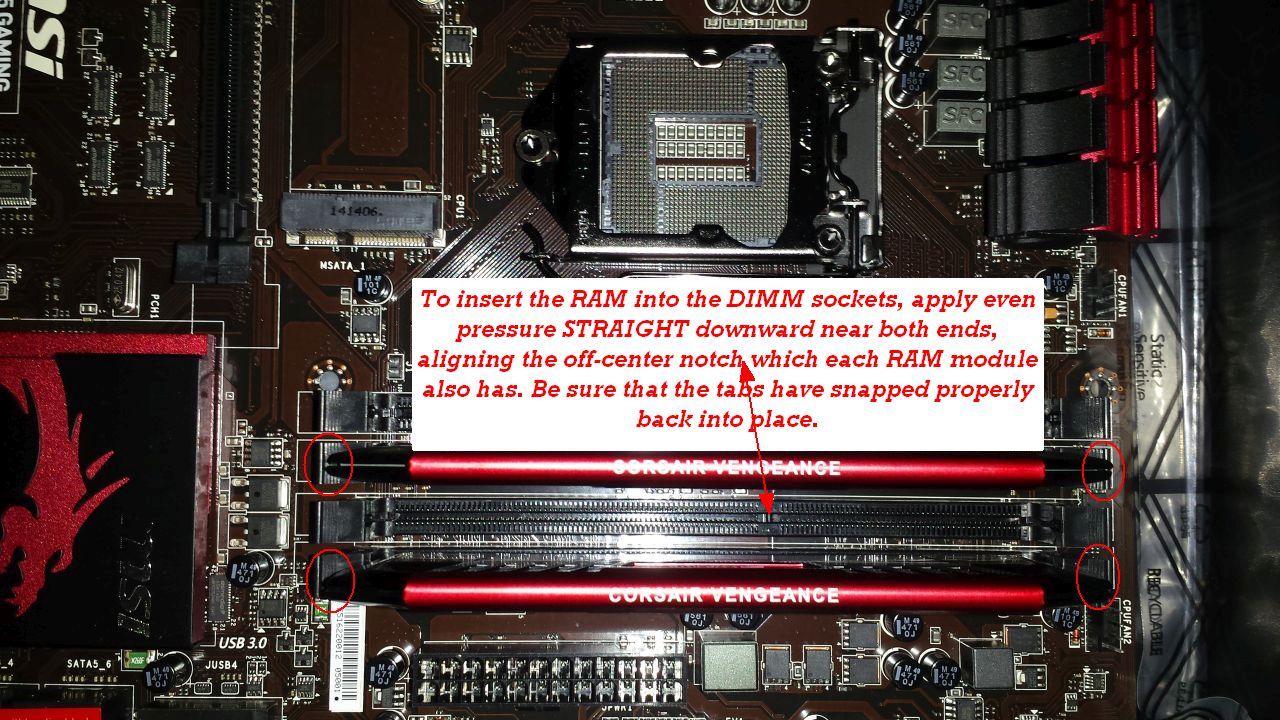
In my experience it makes sense to install as much as possible onto the Motherboard prior to mounting it in the computer case. This and actually installing the Motherboard equal likely the most critical parts of your new computer build. USE CAUTION and do so consistently because the CPU, RAM, Heatsink, and Motherboard installations are very sensitive. Take your time, have a clear head and proceed carefully to complete your new computer build!
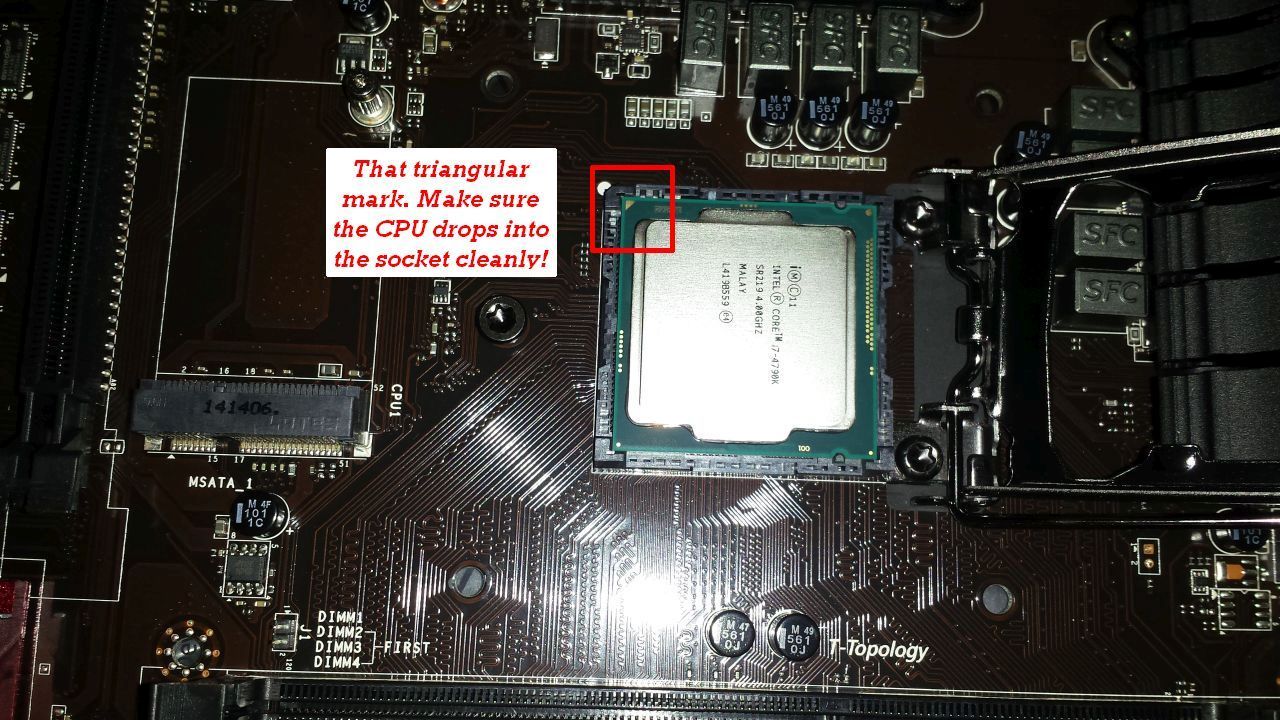
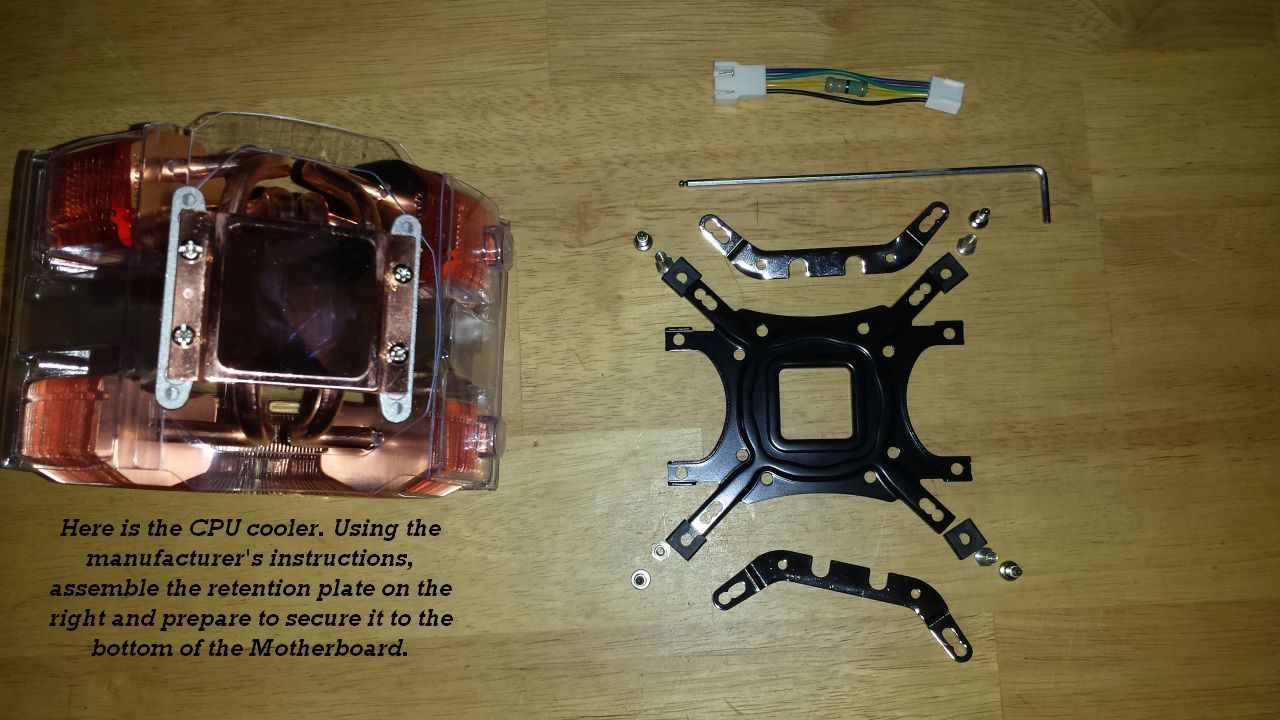
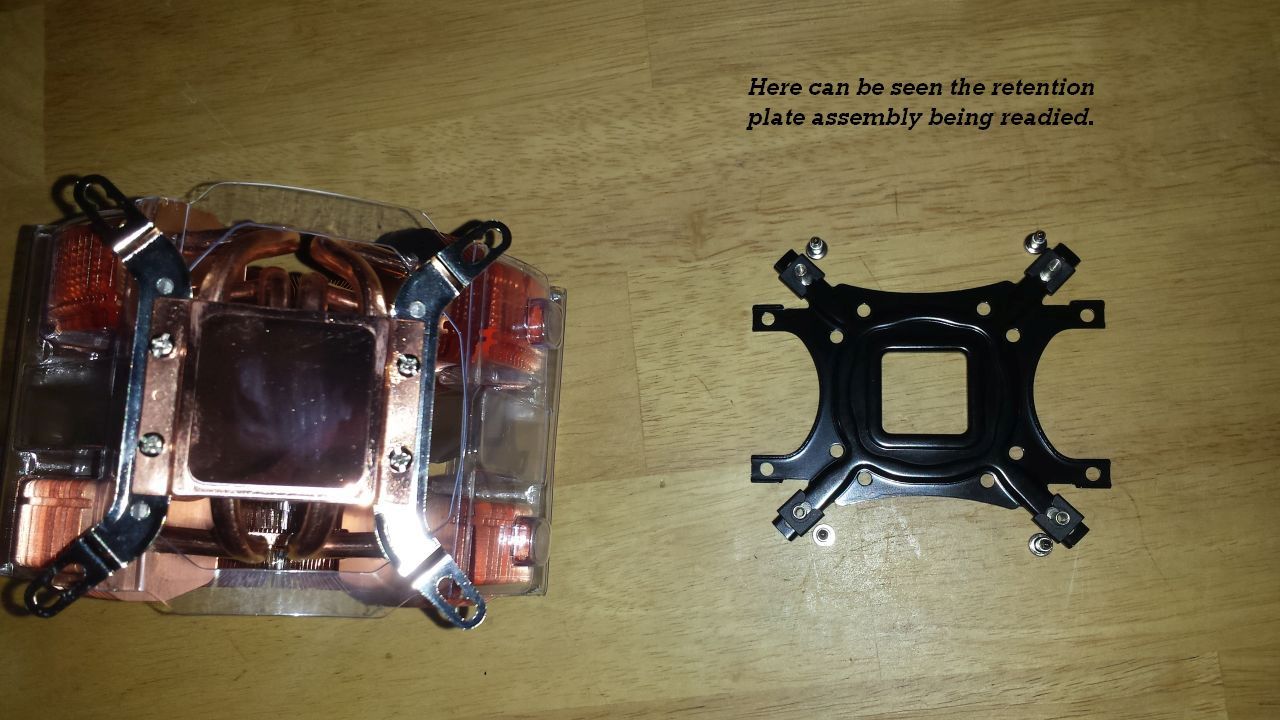
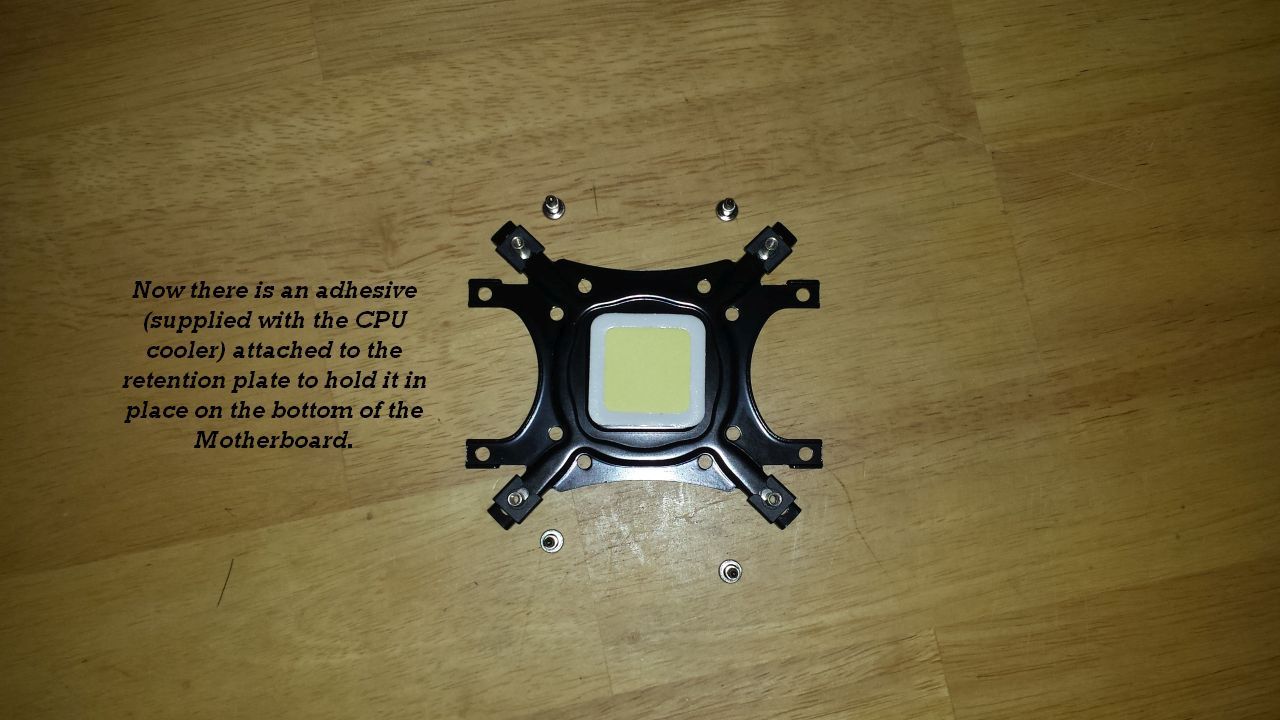
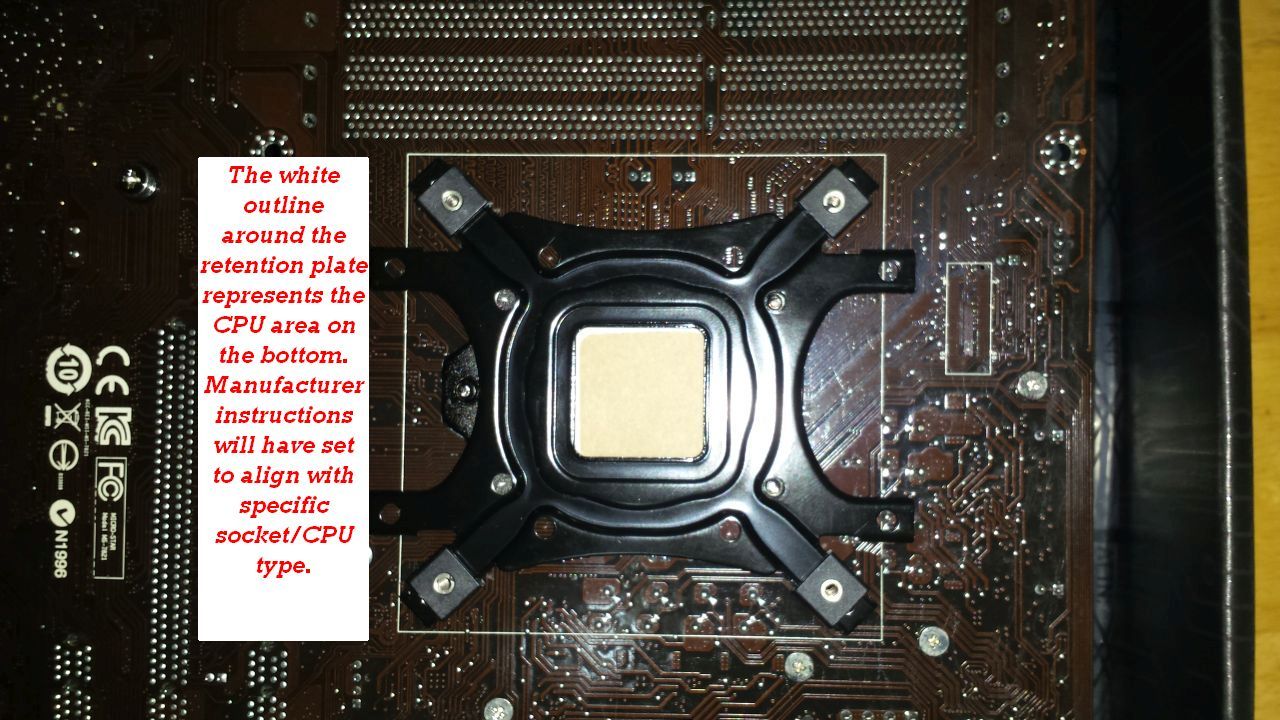
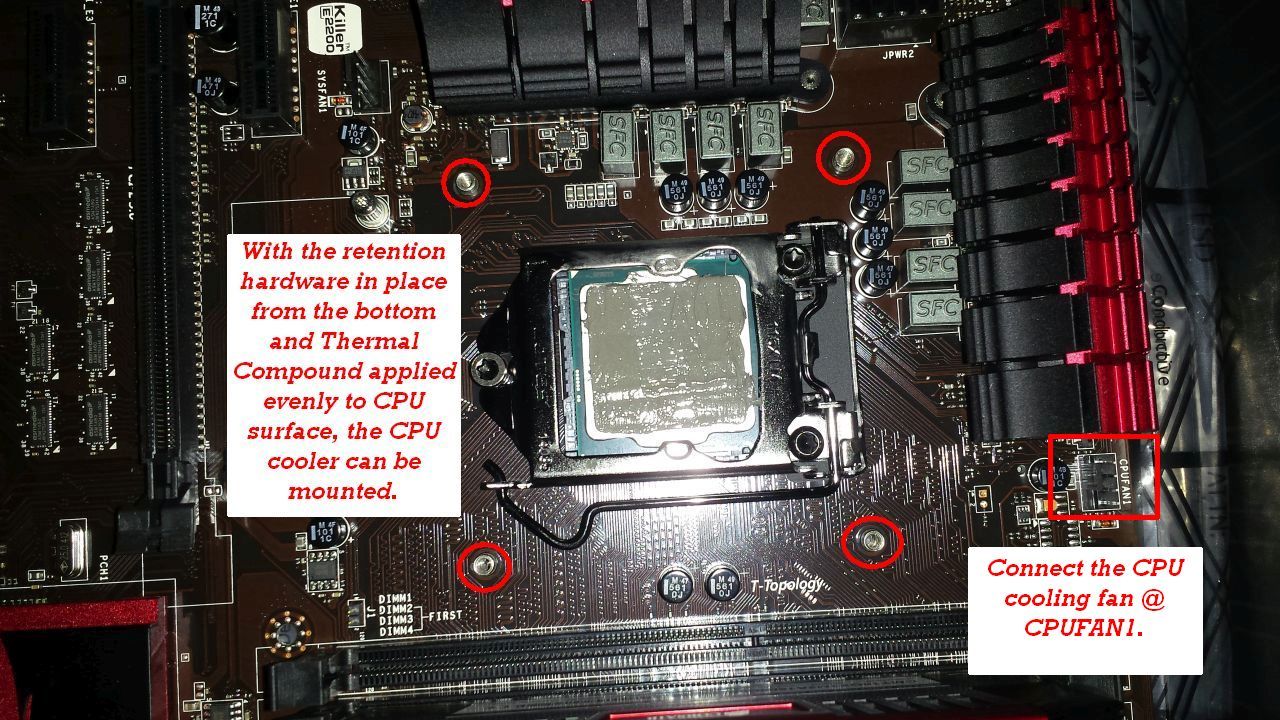
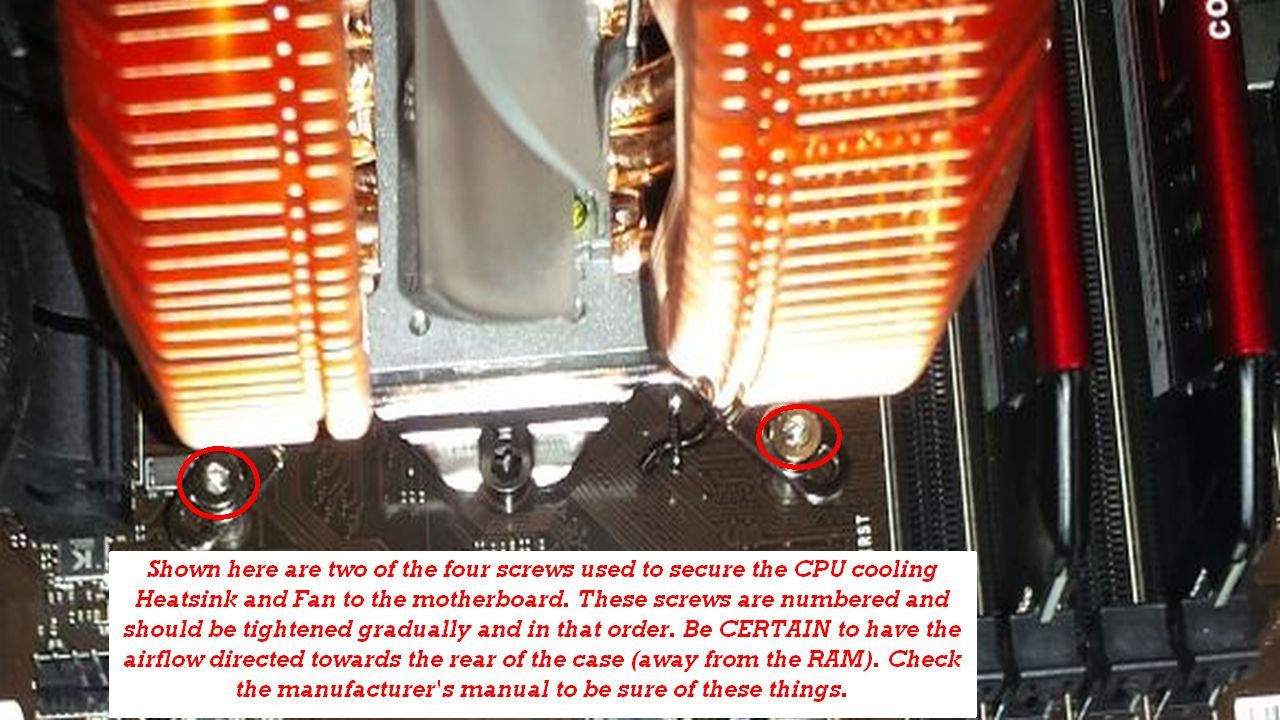
Installing the CPU and Cooling Fan
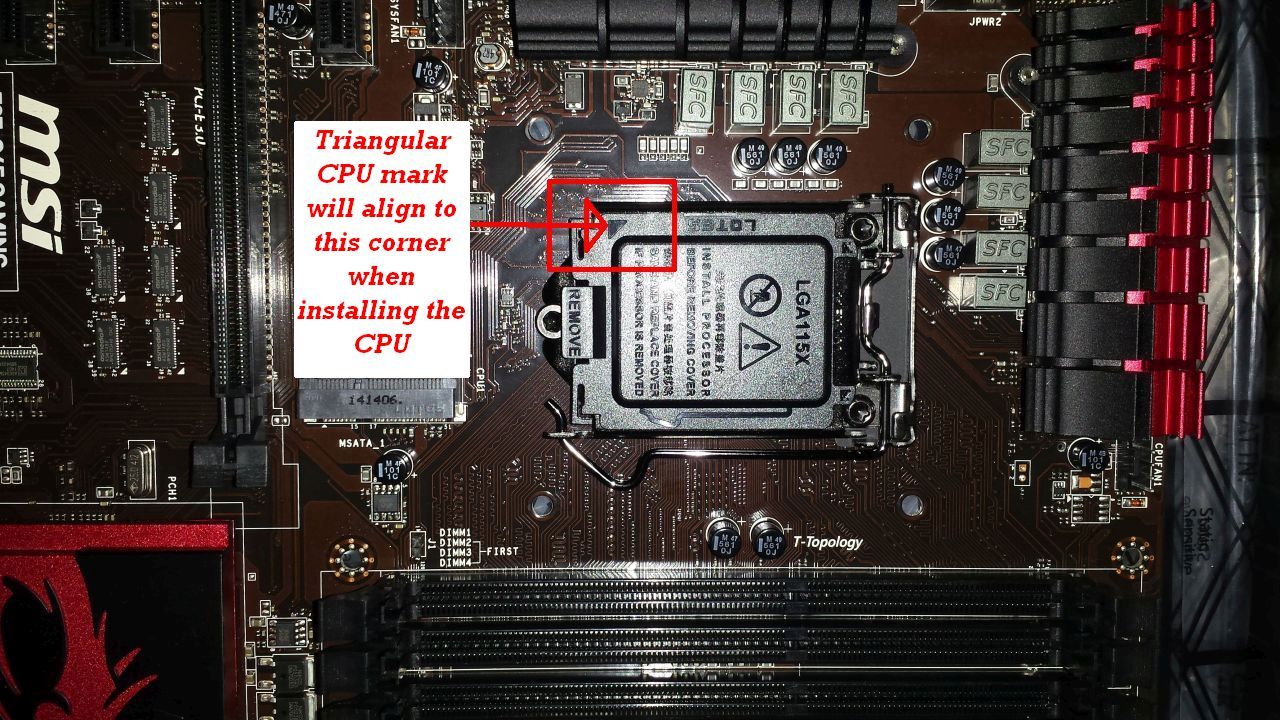
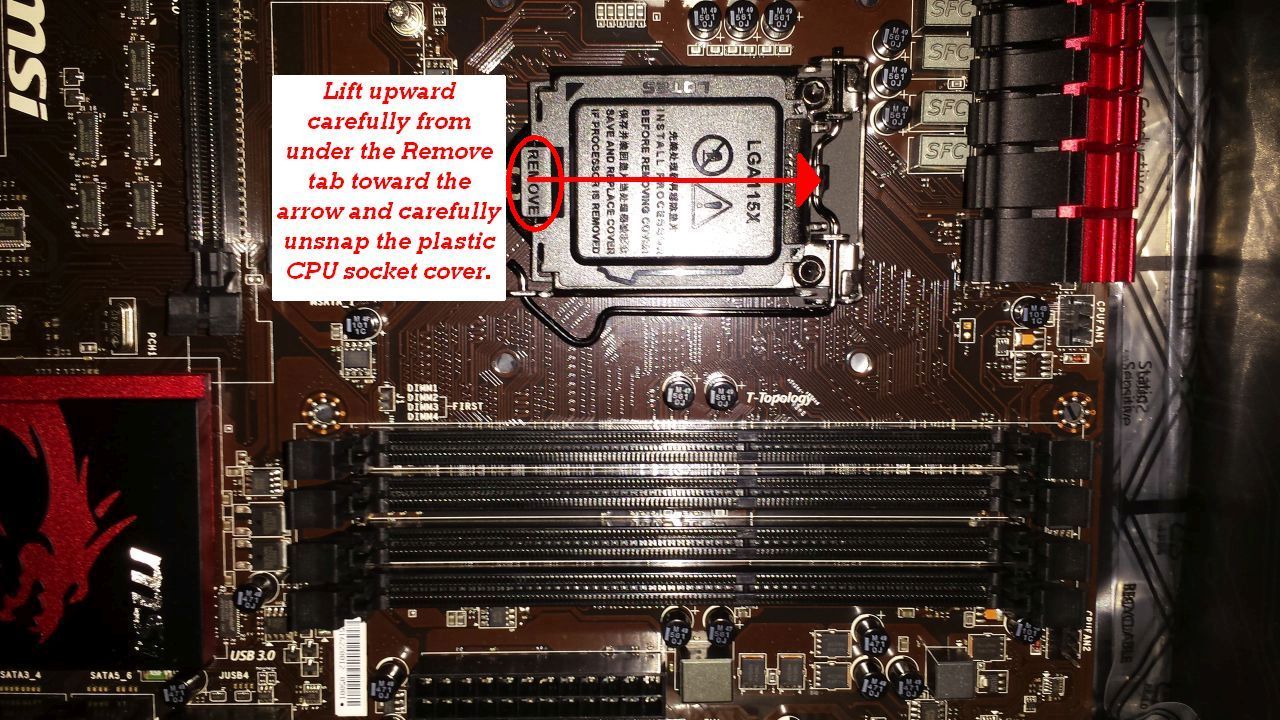
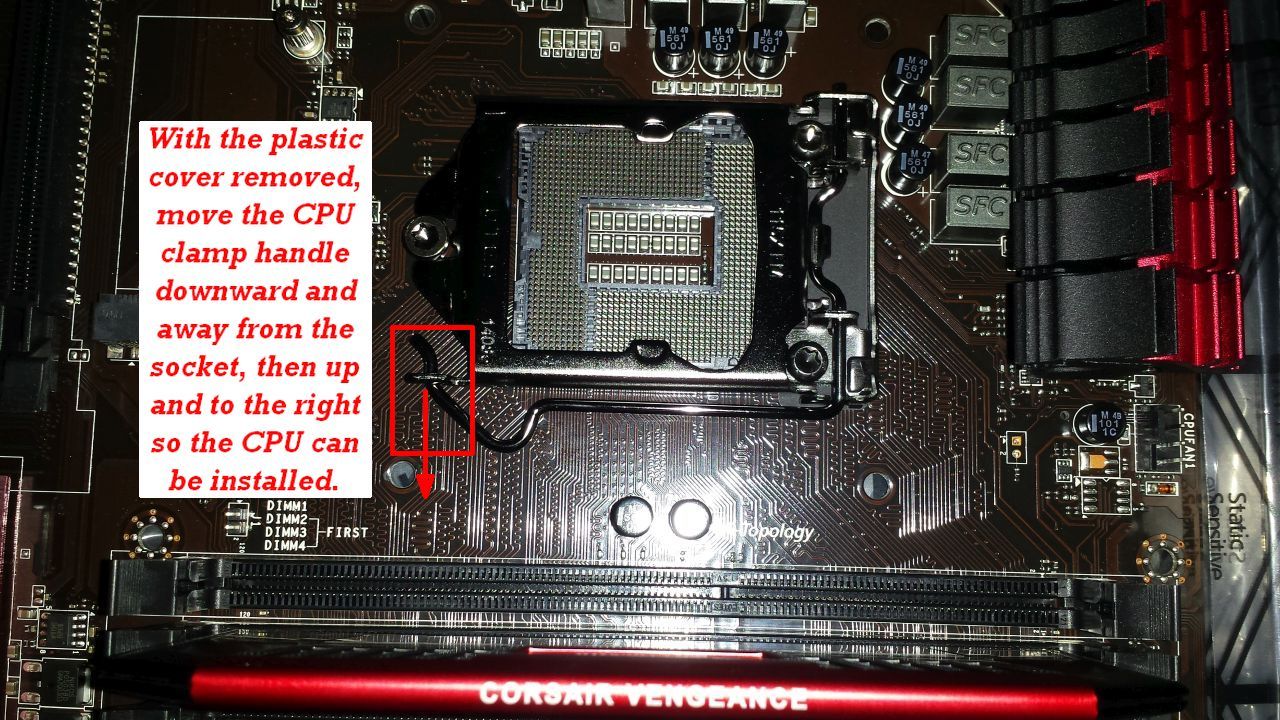
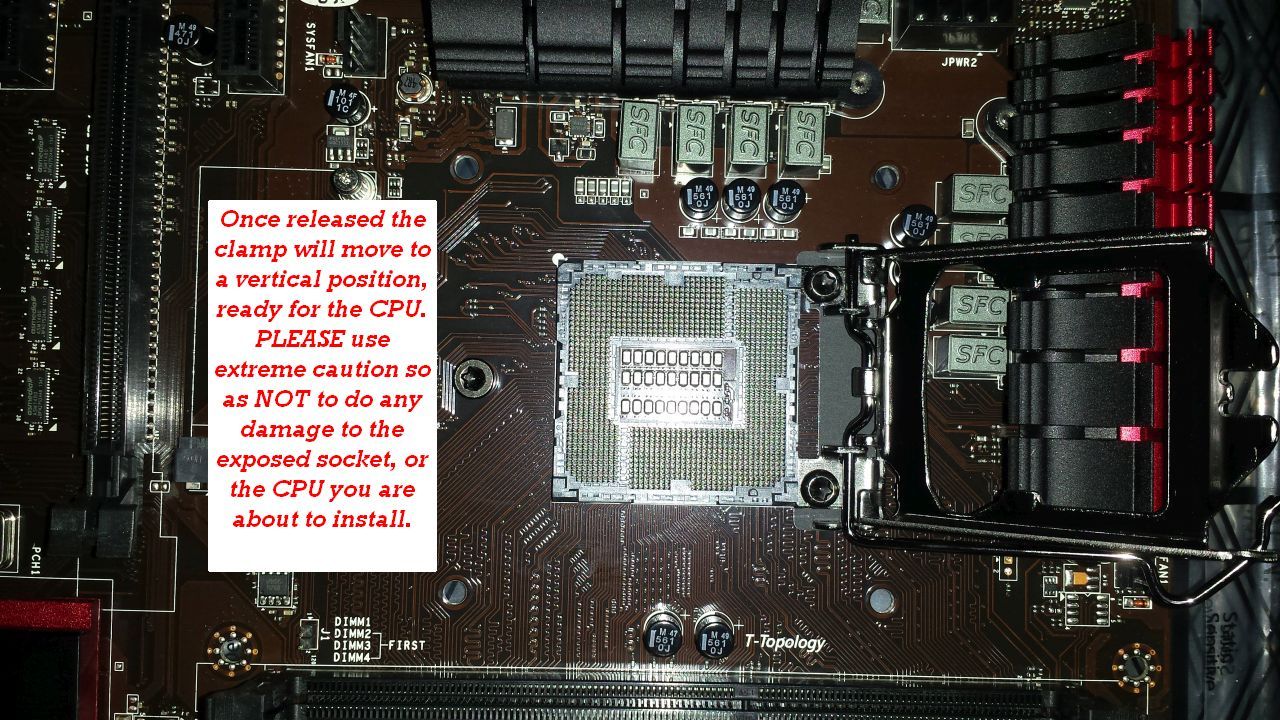
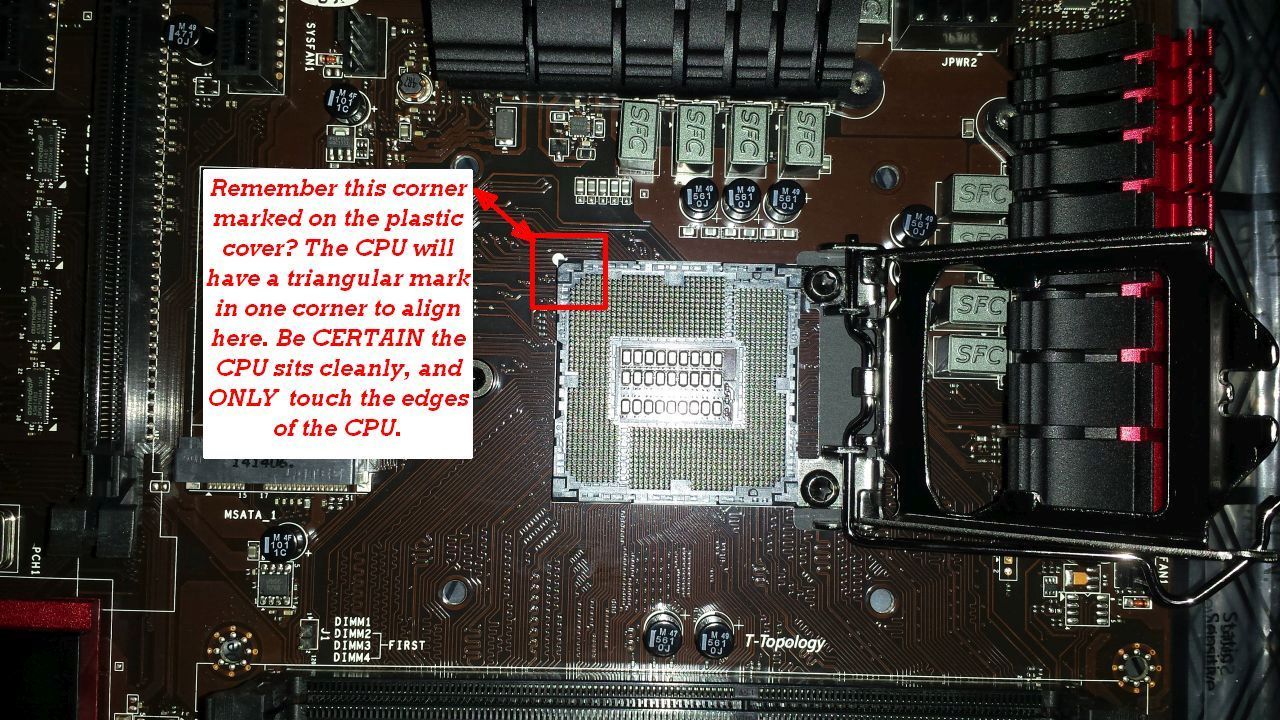
Once the CPU socket is exposed after removing the protective cover please be certain that there is no potential for contamination. It must be and remain clear of obstruction and Clean. The CPU you choose to purchase will likely come with a cooling fan and heatsink but here the option to install a better version is illustrated. In either case there will be instructions and following those closely is advisable.
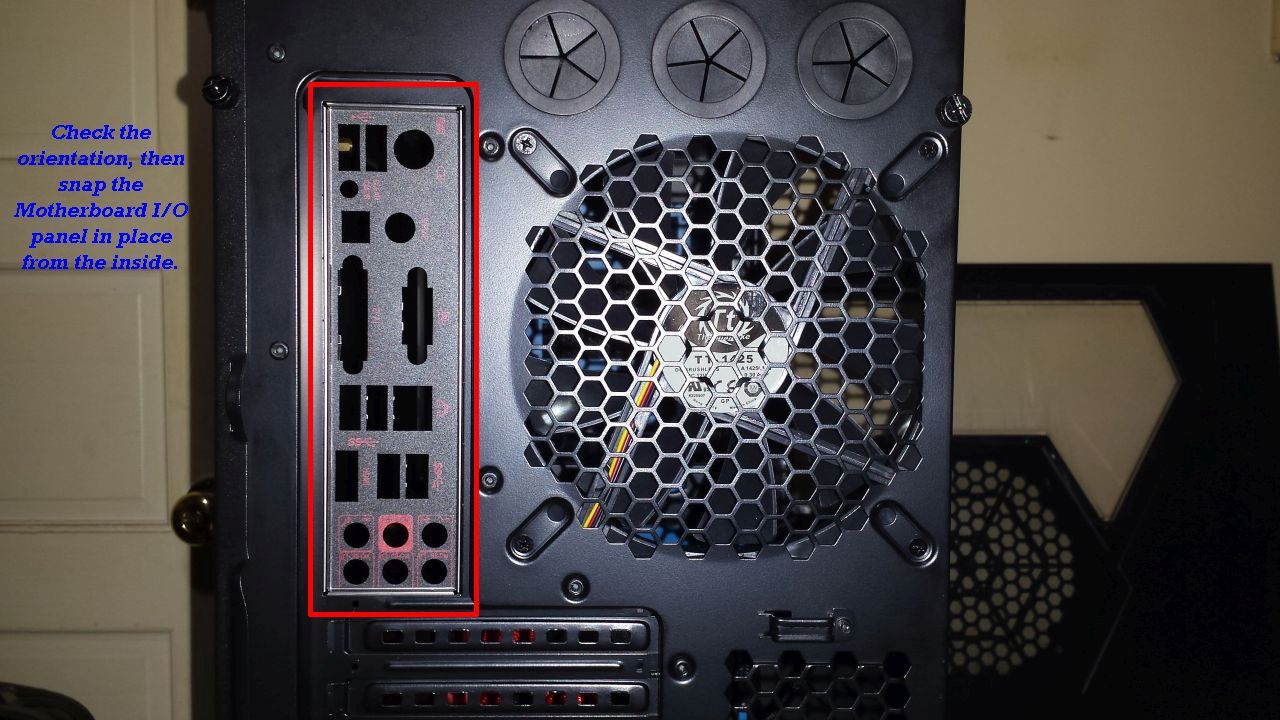
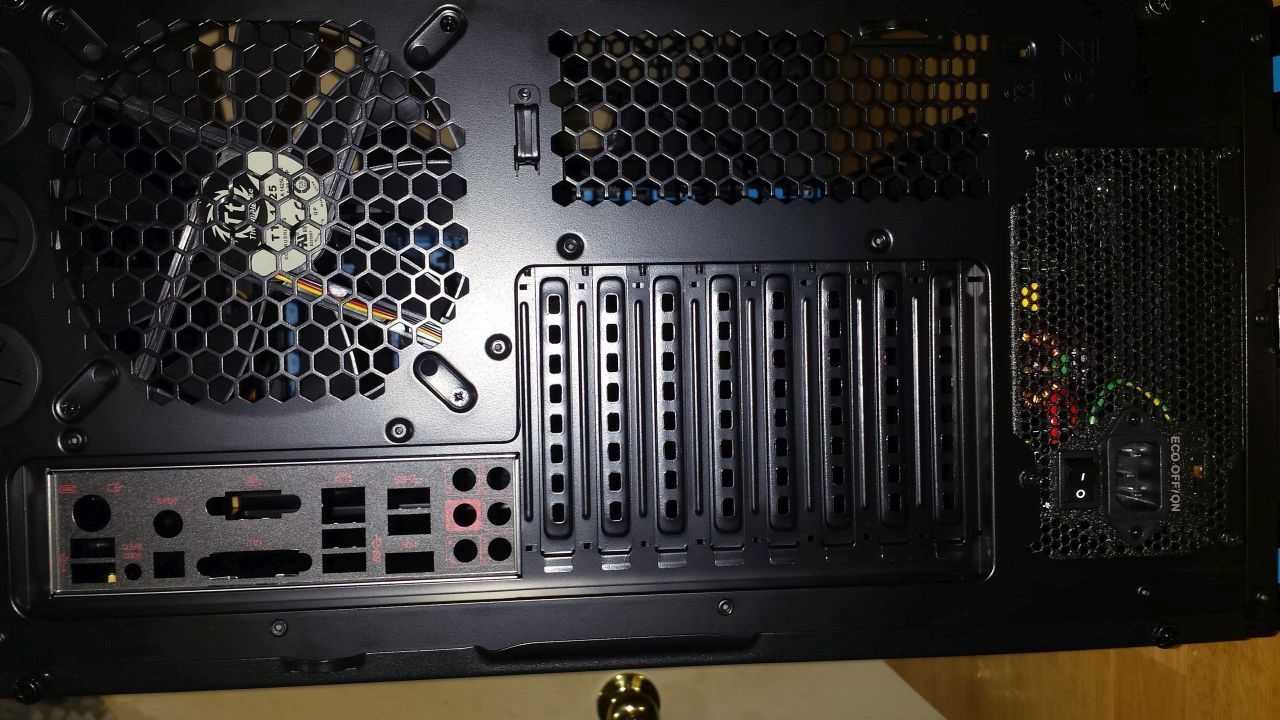
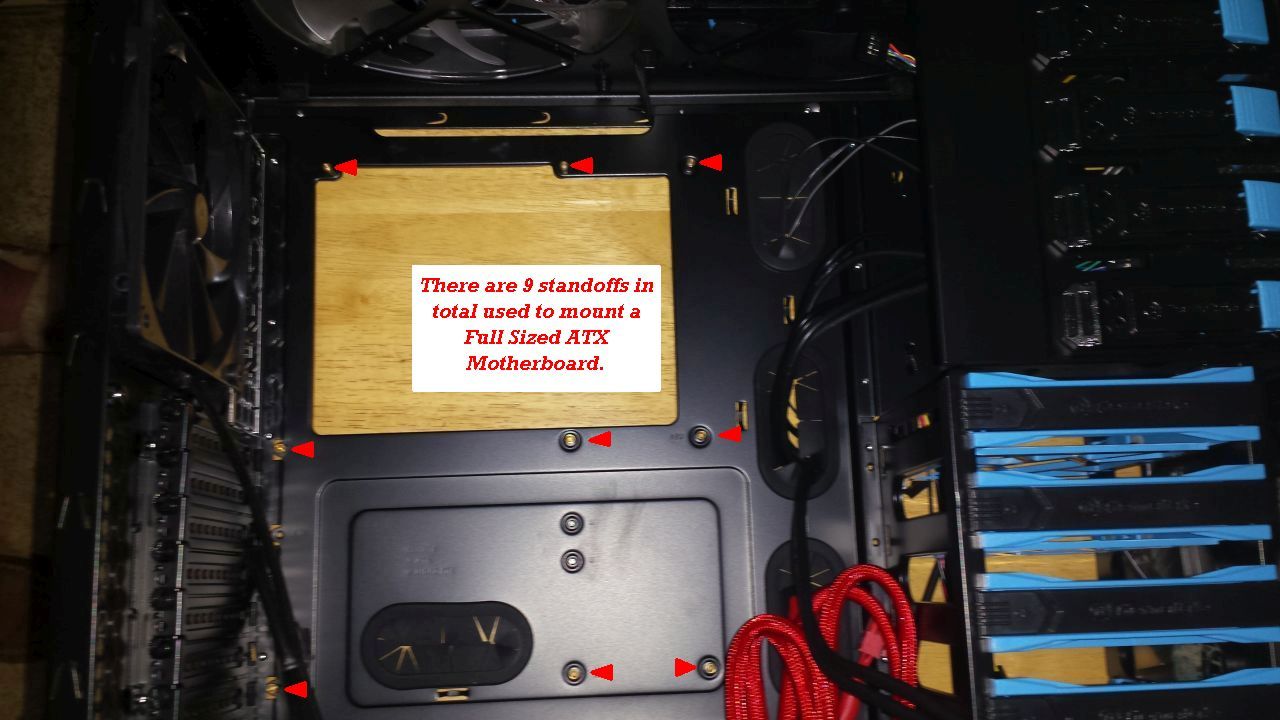
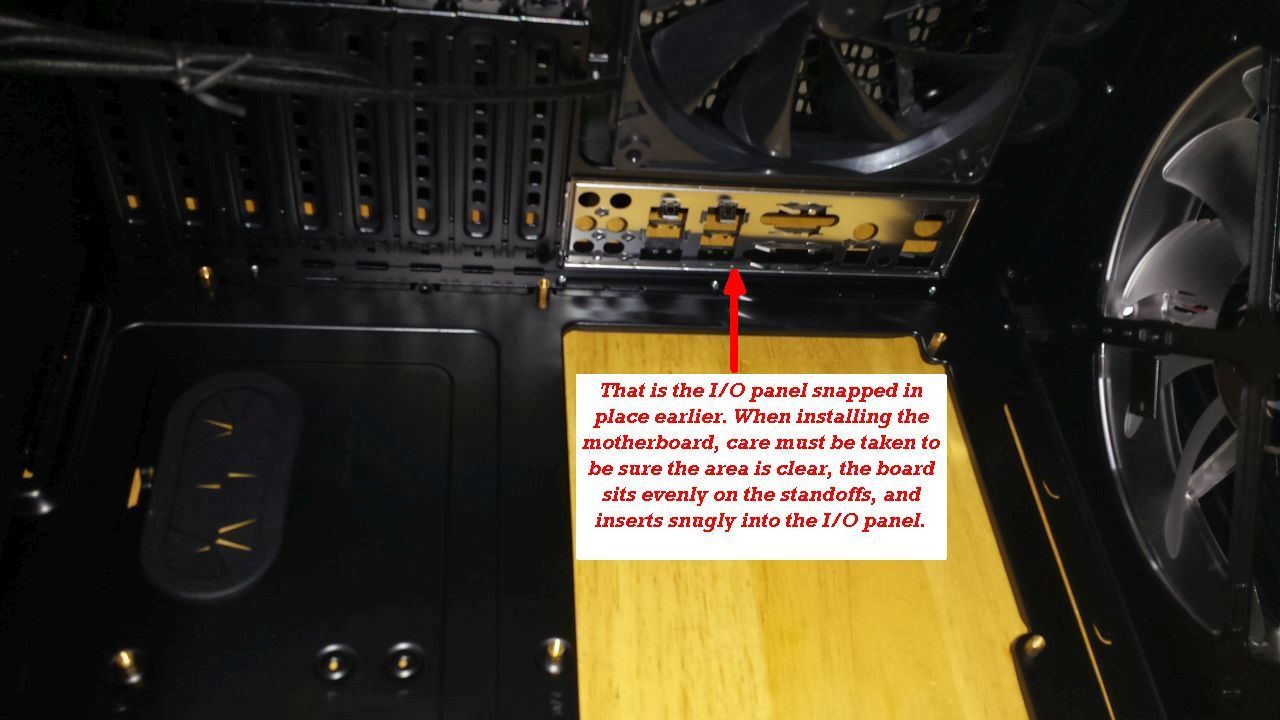
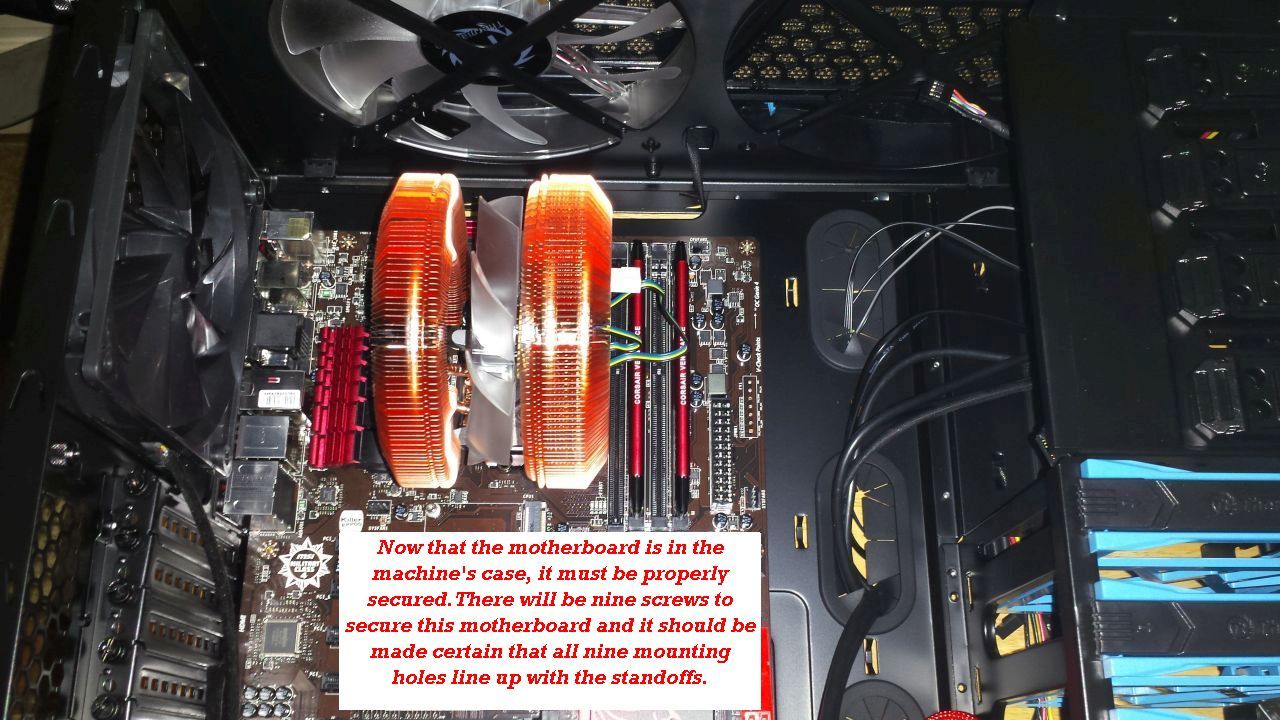
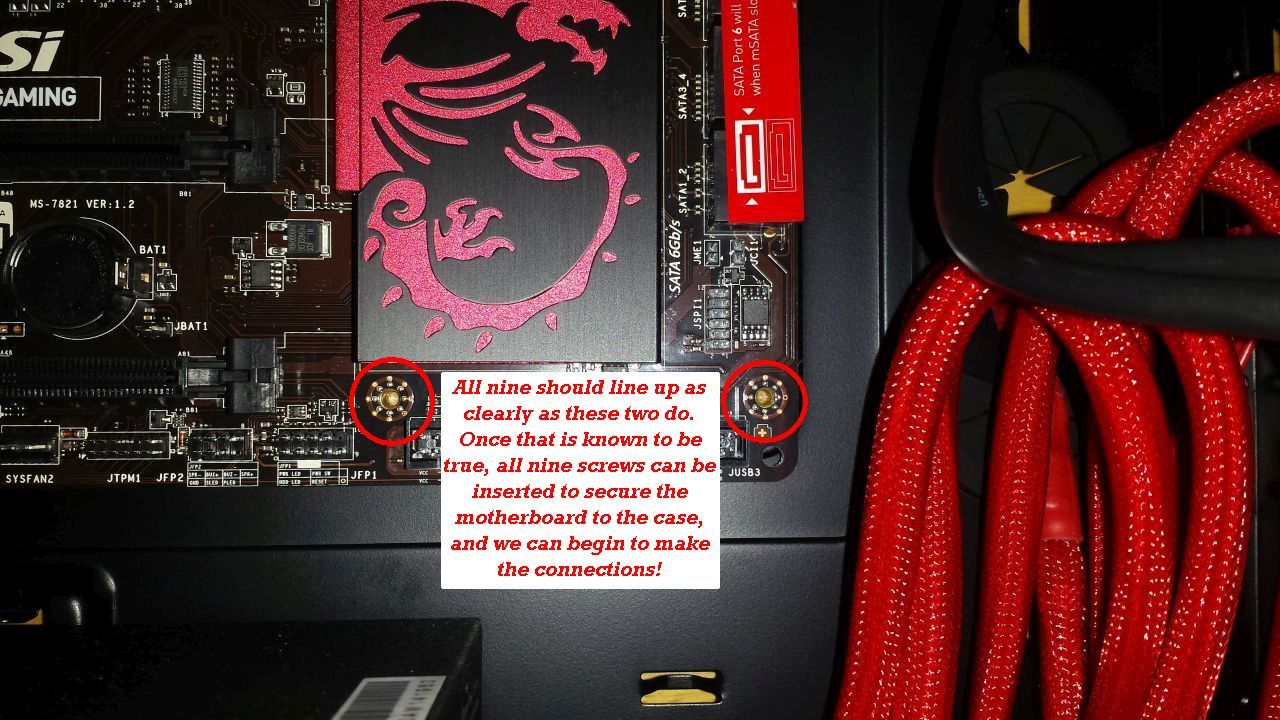
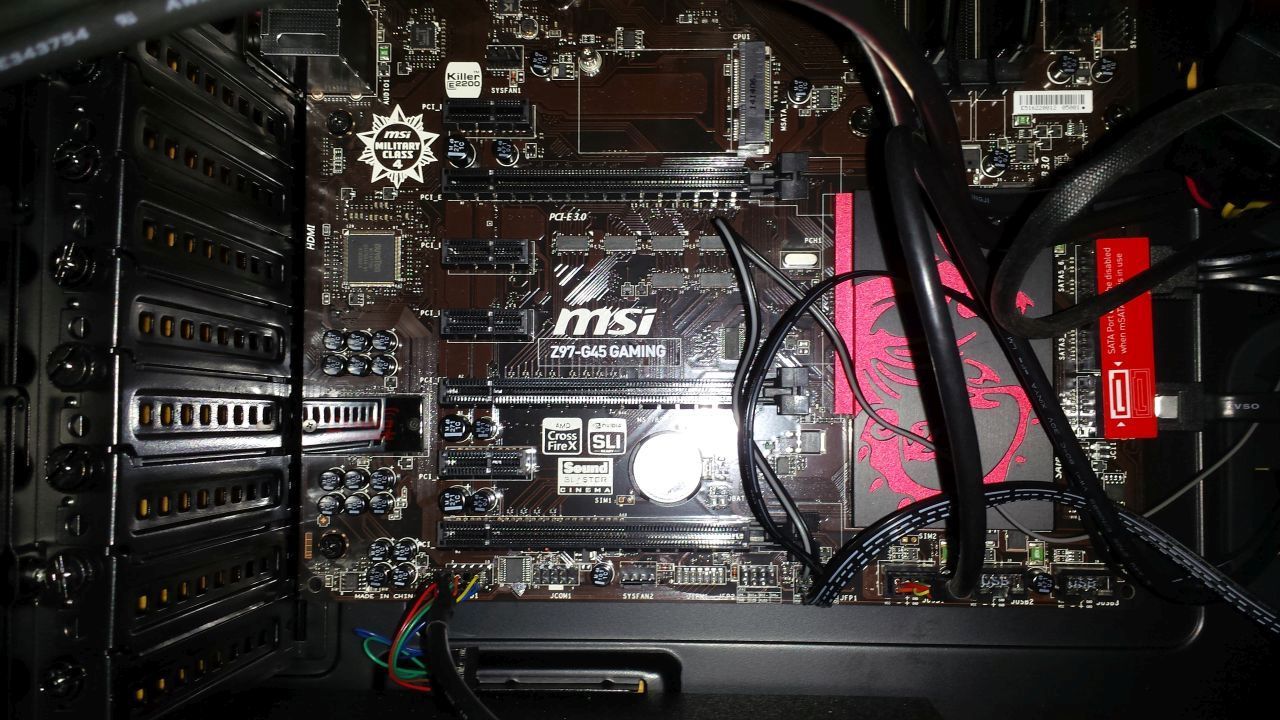
Proper Motherboard Installation
In this case a Full ATX Tower Computer is being built but the computer case would allow for a Mini ATX as well. Slowly aligning both the I/O panel and mounting standoffs is the key here. Once locked in place cabling to the Motherboard will be essentially academic.
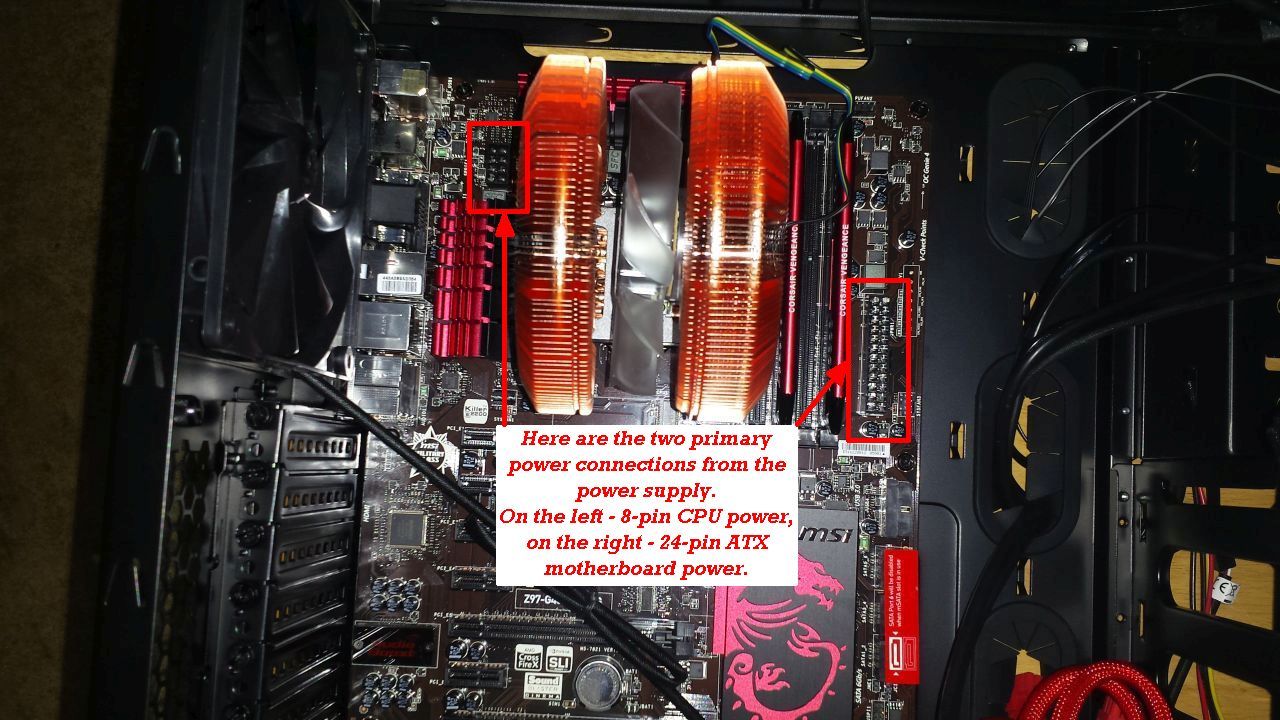

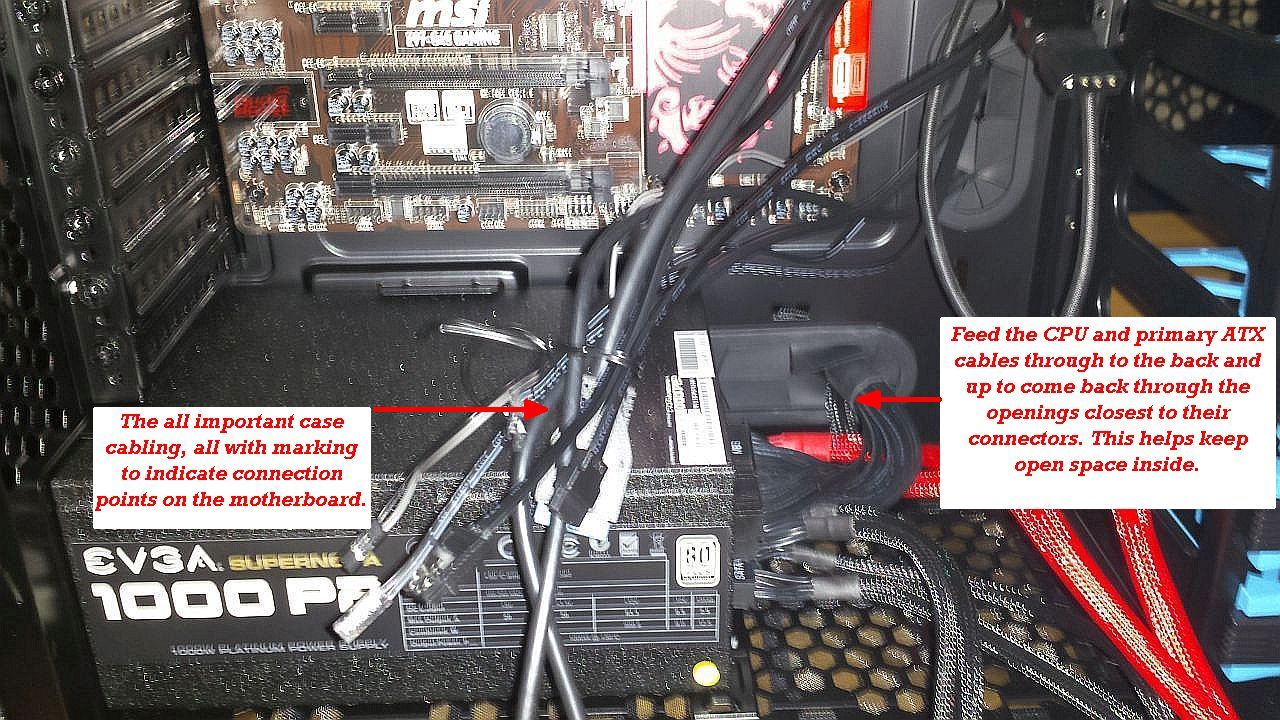
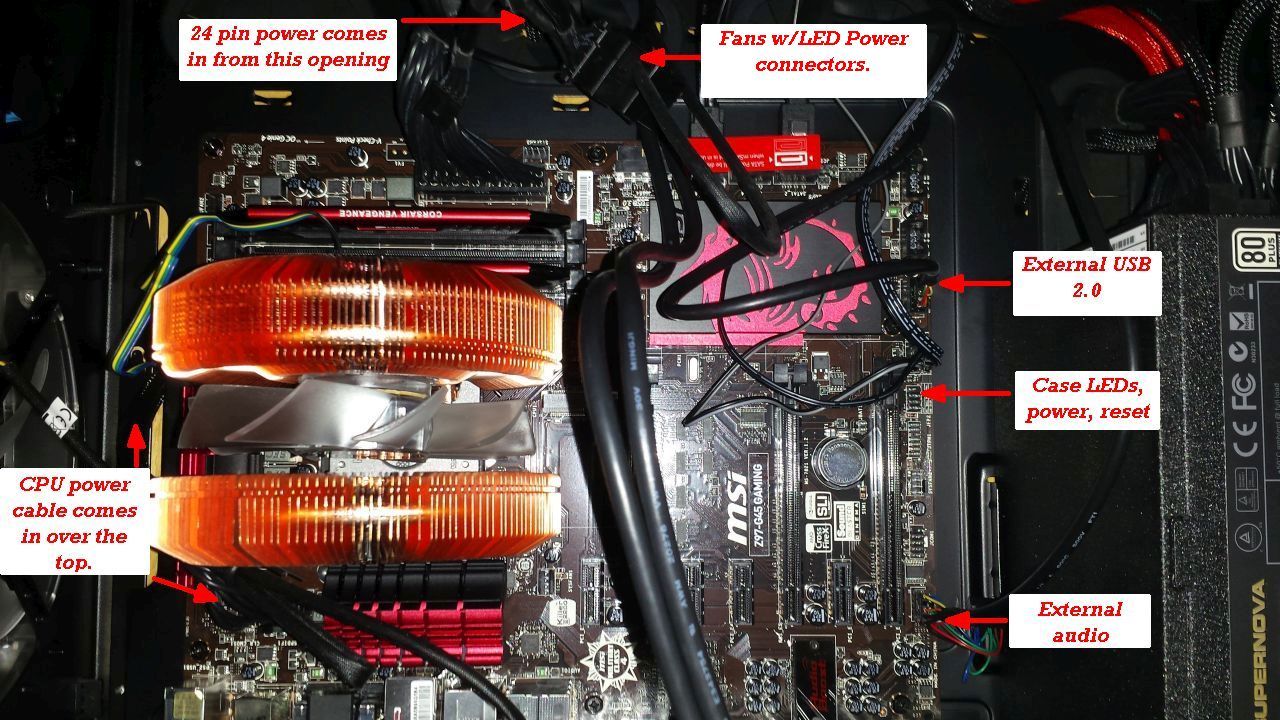
Connecting Internal Devices and Cables
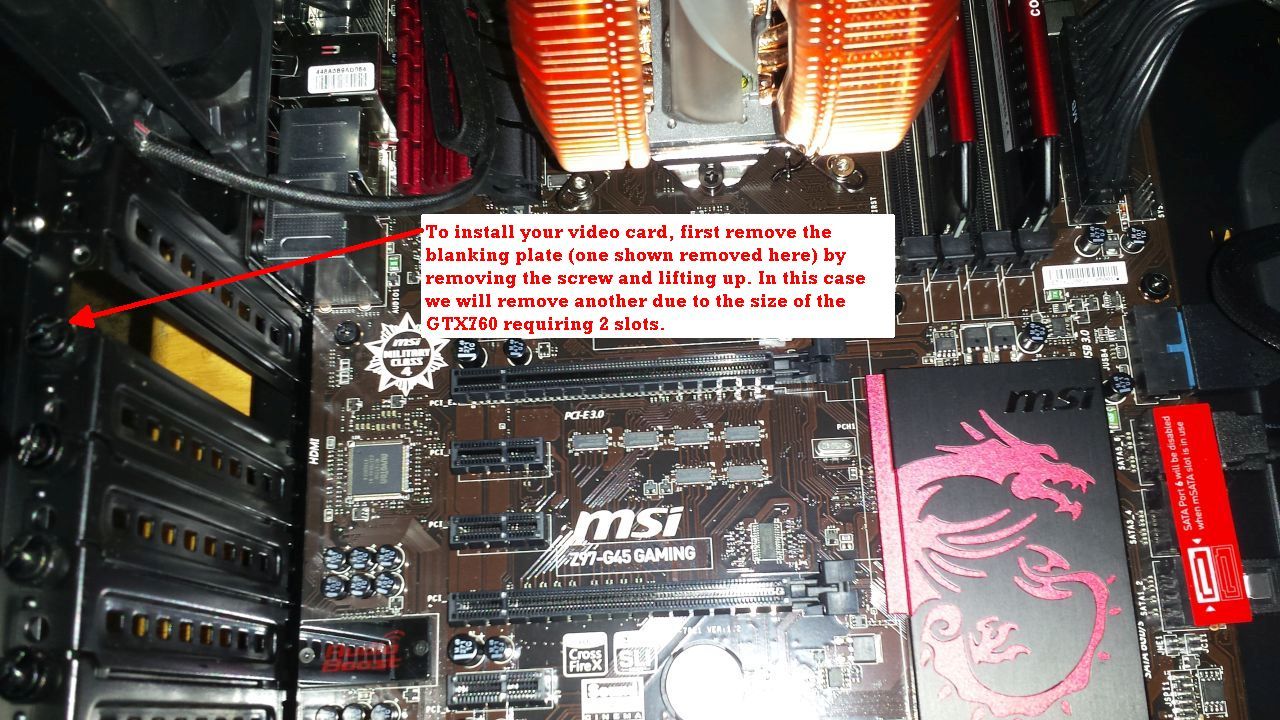
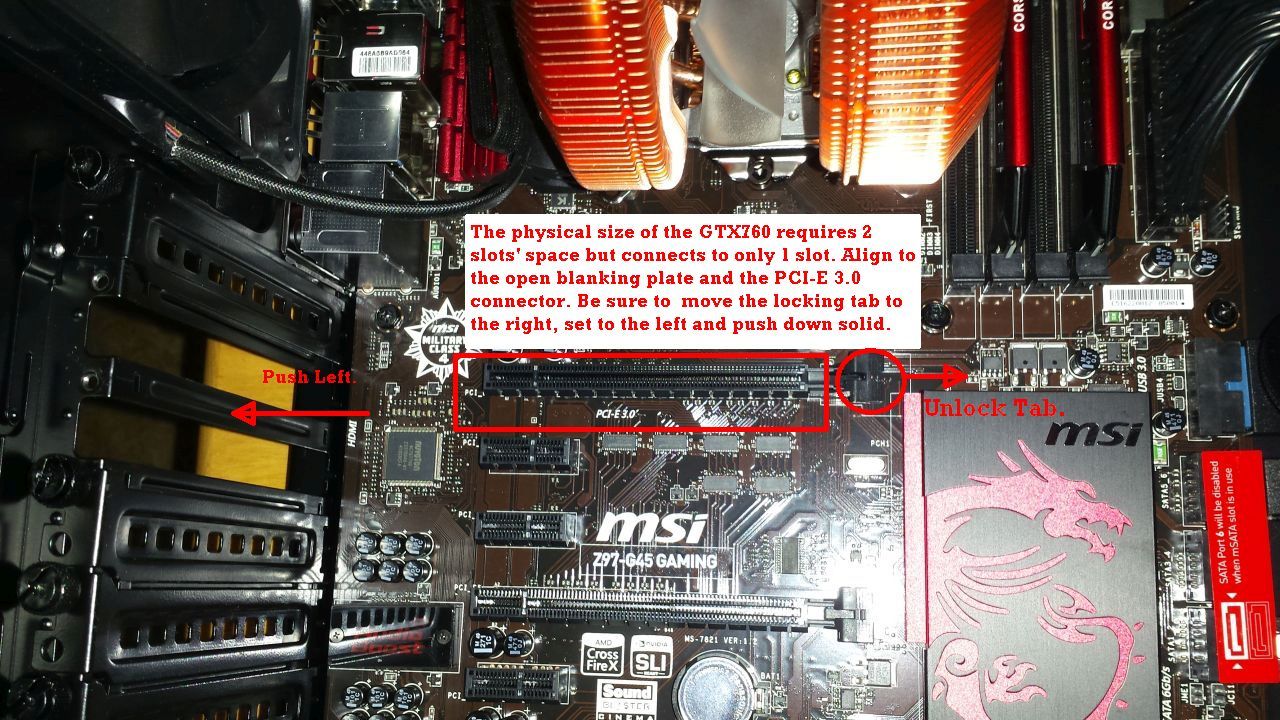
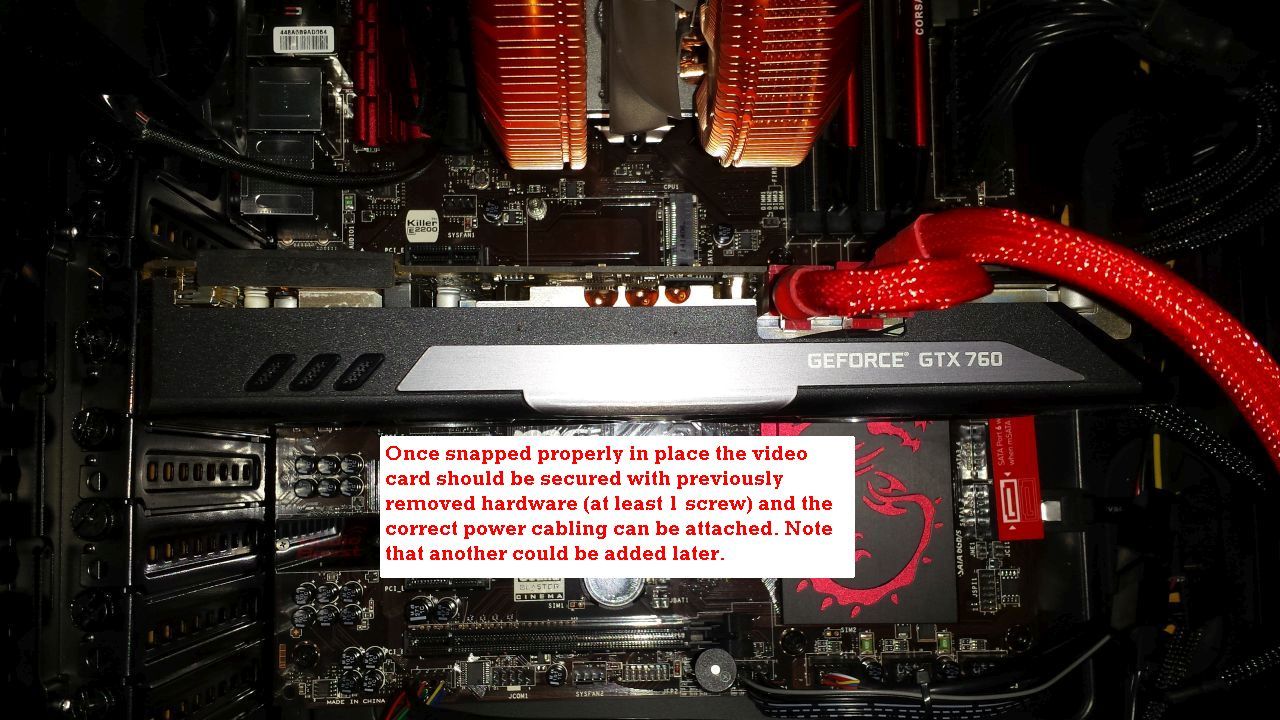
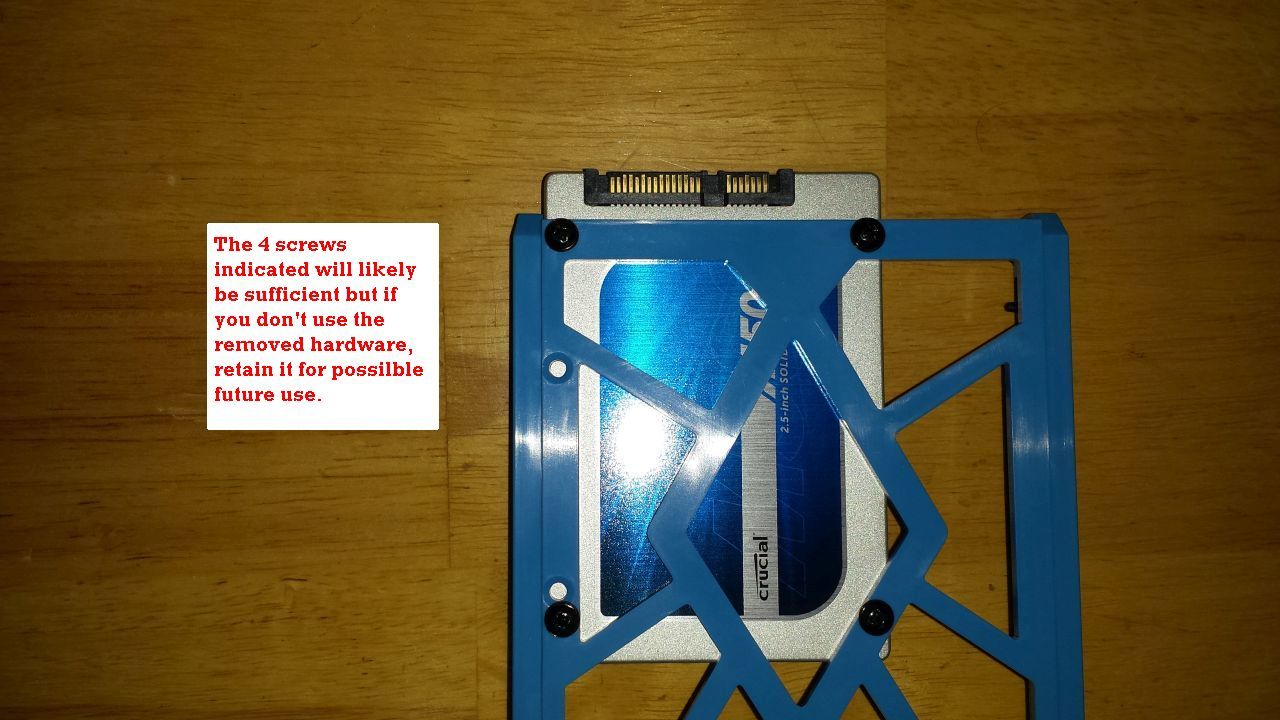
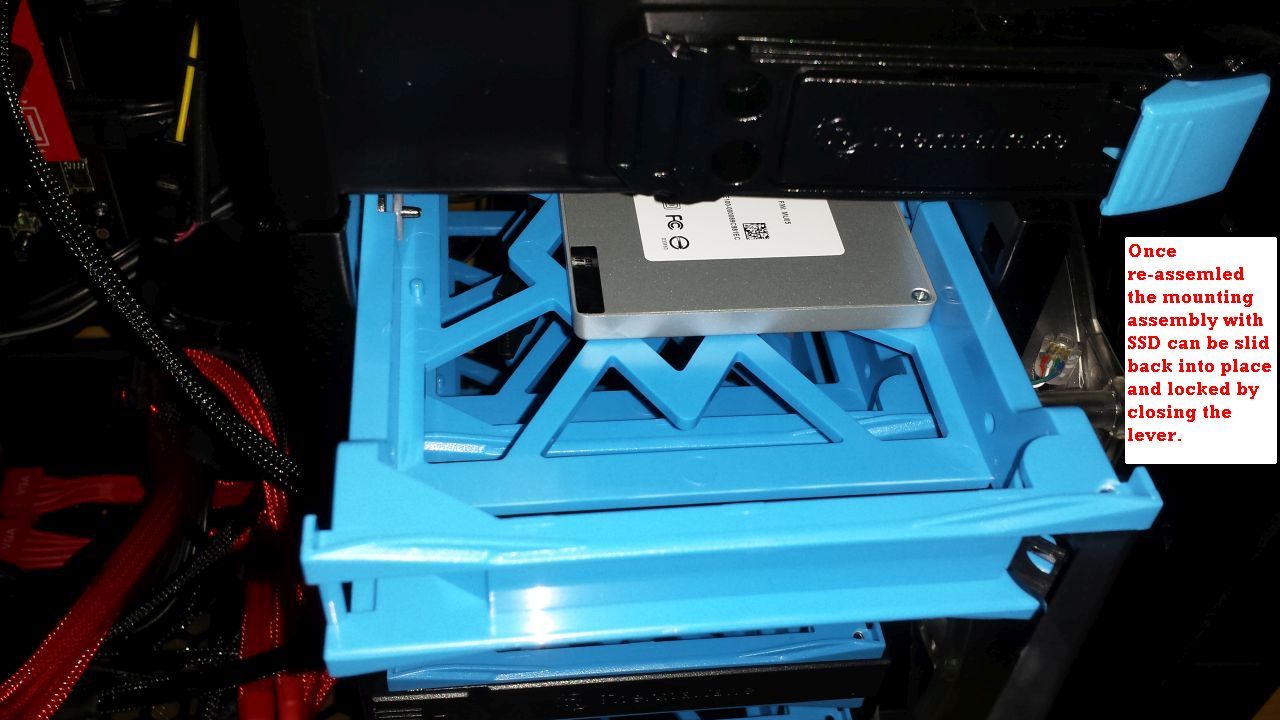
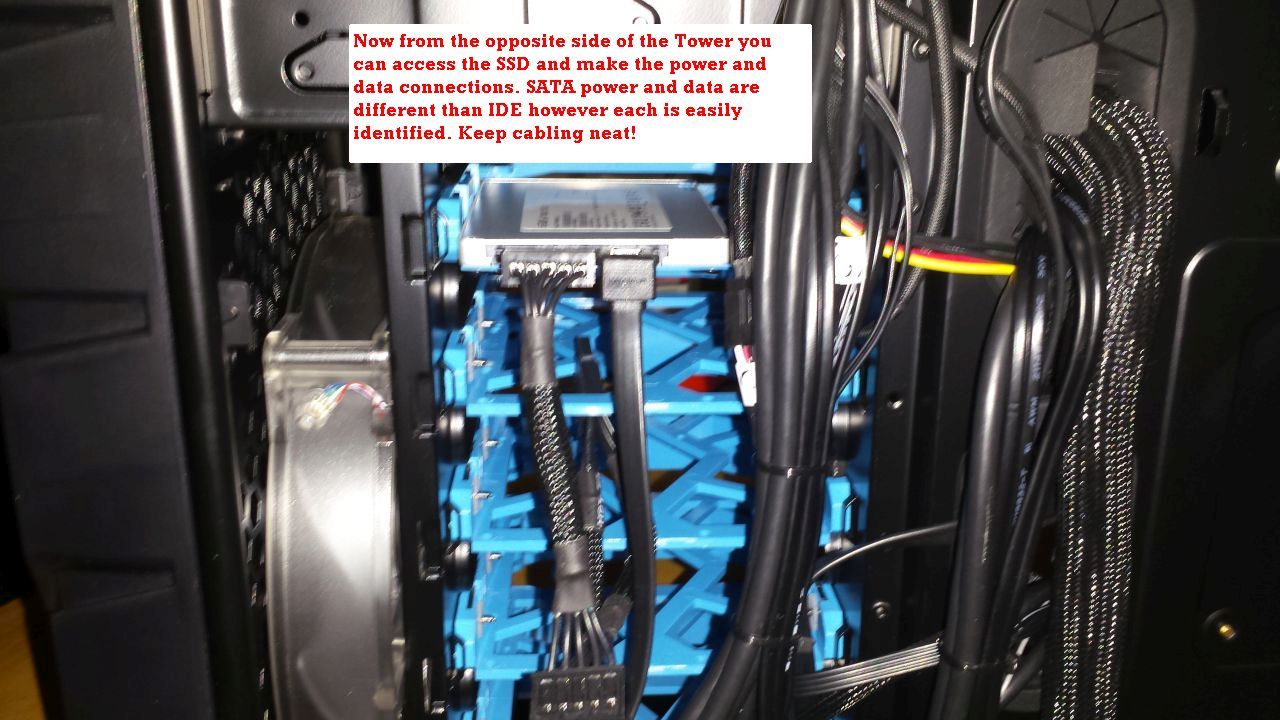
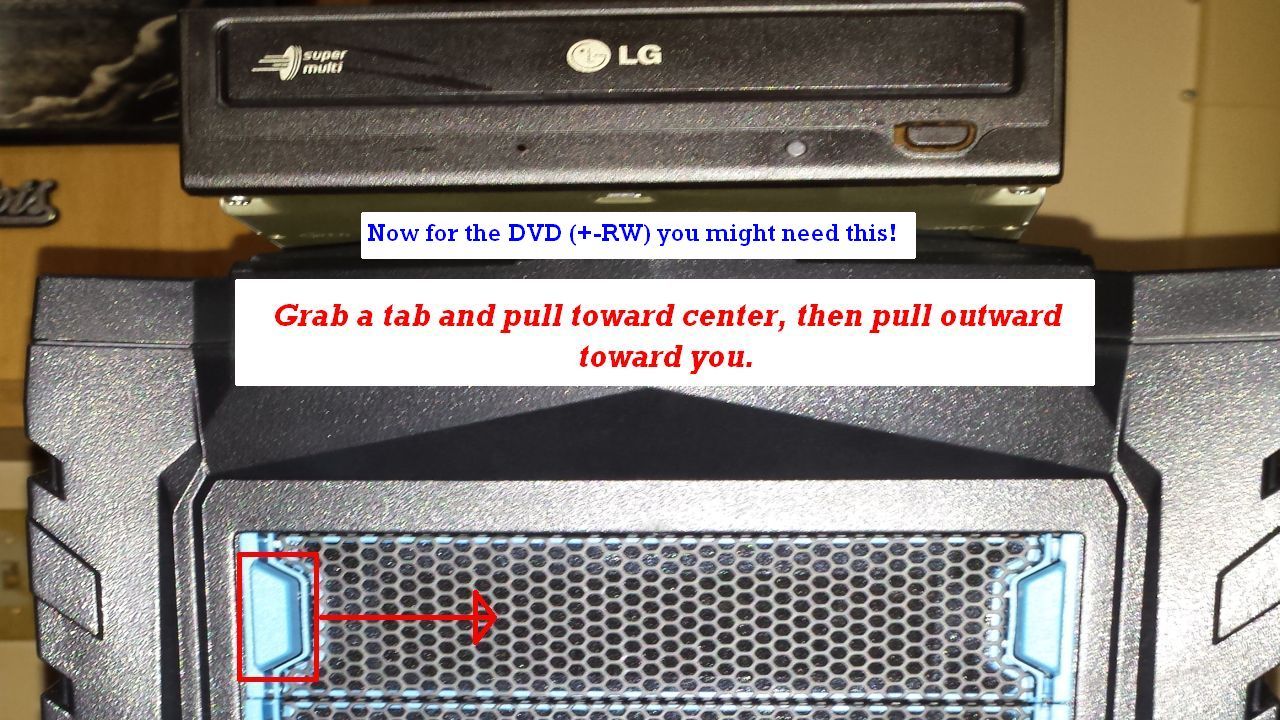
At this point you should have your Motherboard, CPU, RAM, and Computer Case cabling installed. There are just a few more things critical to the computing environment which need to be installed before loading your Operating System and any other software you choose to utilize. This next slideshow illustrates installing a GTX760 video card, a Crucial 480 GB SSD as a primary hard disk, and an LG DVD/RW optical drive. Pay close attention as you work and you will be on the verge of completing your new PC build in short order!
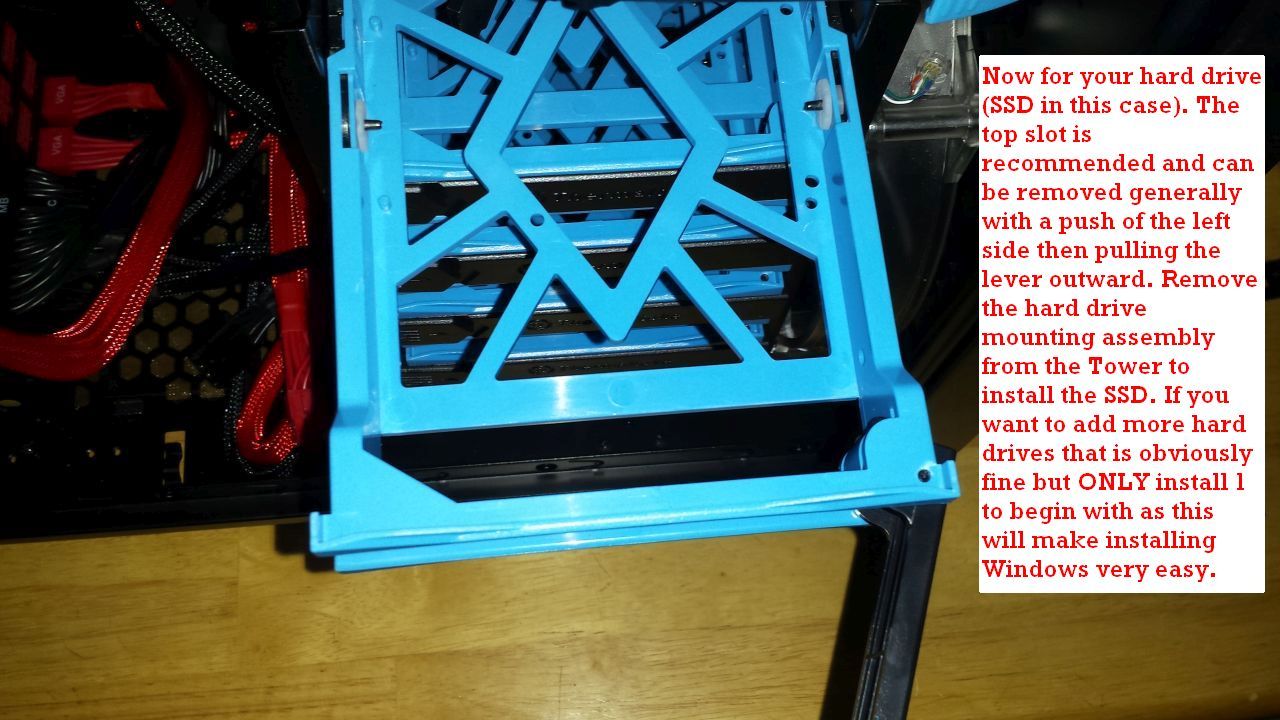

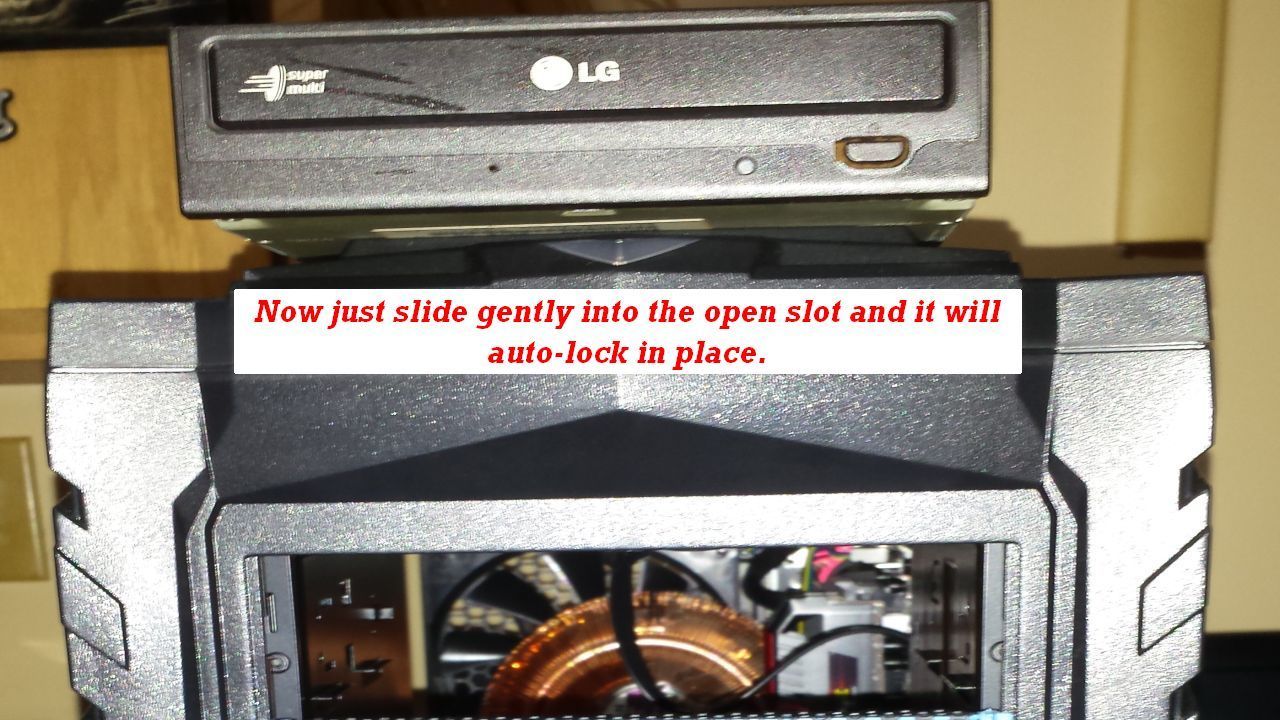
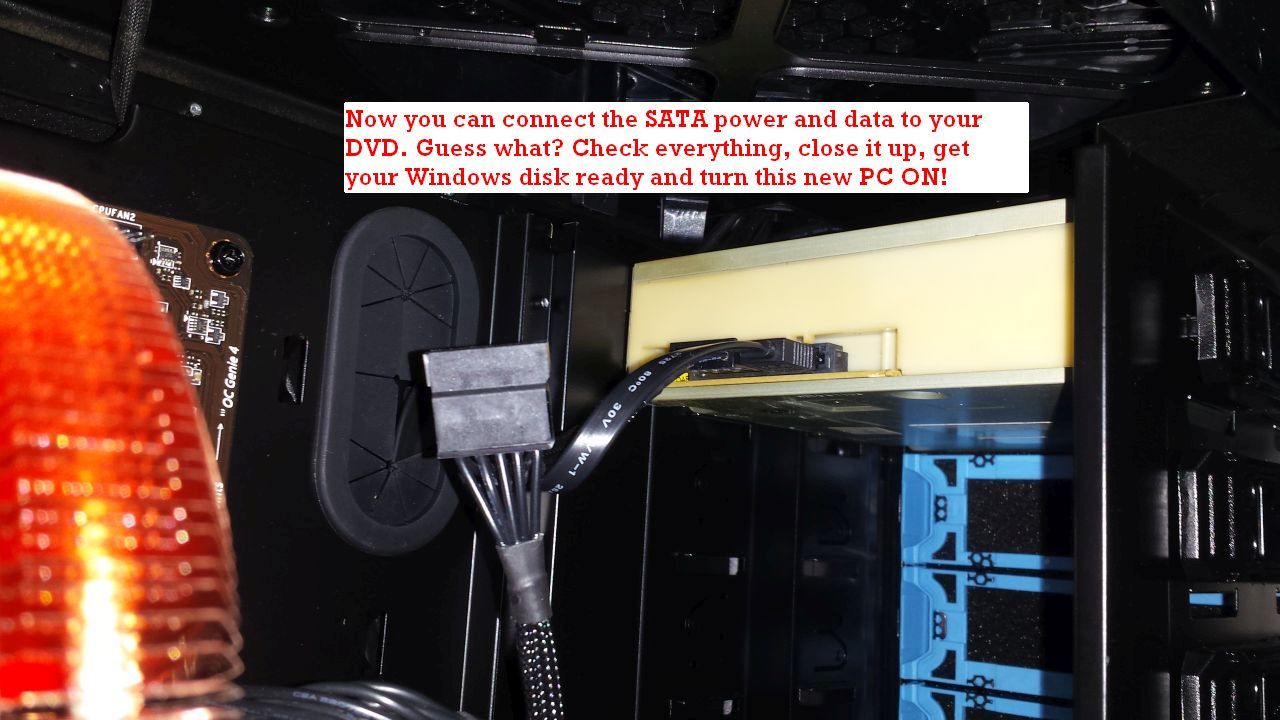
Your new PC is ready to be powered on and you next want to install the Operating System. As long as you have an installation disk - such as Windows 7 Ultimate mentioned earlier - all you need to do is put that disk in the DVD tray and boot/reboot the system. *As mentioned in the slideshow do not connect more than one hard drive to start with as Windows will be more difficult to install with more than hard one hard drive attached.* Once the OS starts to load just follow the prompts to do a new installation and set your preferences. It is recommended to set Windows to update automatically so please do so, and don't forget Antivirus and Malware protection. If you have any questions just Contact Resolve using the form located in the footer or register for the forums!